Using an eBook instead of a laptop for daily work.
BIG WARNING The screenshots on this page are colourful, even though the device which this article talks a lot about is black-and-white. This might happen to be misleading, you have been warned. However, bluntly converting colourful images into greyscale would be even more misleading, because I cannot guarantee that the most natural conversion which (say) imagemagick does is in any way similar to what the dislay does itself, so just take the screenshots with a grain of salt.
This HOWTO needs a bit of a motivational introduction before transitioning to the body of the howto proper.
My first computer was an Intel 80486 with 16 Megabytes of RAM, which could run Windows 3.11. Of course, “could run” did not mean “ran”, because, even though Windows was fun, with all its folders and drawers, it did not support, in most cases, what I considered a computer to be most useful for – games. Even though games could, in theory, run on Windows too, it would usually consume too much RAM, so it was a safer choice to exit into the underlying DOS command-line, and run games from there.
I am not nostalgic about that time, but there was one point which was very clear to those who remember that era: fancy features of a program do not necessarily mean it is useful for what you need.
Since that time my daily working environment has progressed immensely. I had a desktop computer, I had a semi-roadwarrior setup with a desktop mothership, and a lightweight laptop serving as a terminal while I am not at home. Then the age of CGNAT came, and this has become clunky, so I have moved to an ordinary laptop, and a weak fanless server needing very little attention. Later I became frustrated with a weak laptop being unable to run demos that I had wanted to examine to improving working efficiency, and I bought a mobile powerhouse which was good in every respect except that it was heavy and easily overheating. Also its battery time didn’t exceed 2 hours, which was not enough for company meetings, so I bought a huge laptop powerbank, weighing two more kilos, which increased my daily backpack load to about 15 kilograms.
I used to carry all that to work every day, and even to coffee shops where I would work during weekends, for over a year, and I could have been doing this even longer, if another fatal blow didn’t land a finishing blow to my otherwise stable setup. I started experimenting with lightbulbs in my home, and found that classic Edison’s lightbulbs emit light so incomparably more pleasant to the eyes than the crappy LED ones, that I just knew that if I want to fix my sleeping schedule in some way, I need to fix my working environment.
I replaced all the crappy LEDs in my flat with classic lightbulbs, which added about an hour to my daily sleeping time. But my laptop was still a problem. The horrible blue LED light was shining me right into the eyes during most of the day, even though I have minimised its annoyance by setting up a dark theme on my desktop. But that made working outside nearly impossible, since even when I was ready to bear the load of 15kg backpack when going for a walk, carrying that hellish laptop powerbank with a built-in fan, working with a dark theme is basically impossible in broad daylight.
I turned up my brain, and started to invent.
After iterating over a few unsuccessful attempts, I found a particular setup which rendered my quality of life an order of magnitude better than it used to be, and this file is about presenting it to the broad audience.
I bought Onyx Boox Max 2.
It is an A4 eBook with an incredibly high-resolution eInk display, which can display gray-scale, to some extent, and after some tweaking can be reliable and performant enough to let me perform about 80% of the tasks I need. Its best property is that it does not emit light at all. It’s black is actually black, and its white is actually so white that it can reflect sunlight, so working in a broad daylight is a bliss, and even at home one can use a desk lamp to provide artificial illumination for the display. I bought it second-hand, because I was not sure it would satisfy my requirements, and fell in love with it so much that I am writing this essay.
Its refresh rate is, let’s say, about 5 FPS, which is not enough to watch videos, but is enough to do coding, writing texts, reading ebooks, viewing PDFs, doing pretty much everything that my computer from 1994 could do.
It has a touch-screen, and is sold with a stylus, which is incredibly precise. Since now I really care about weight, it is a big plus that I don’t have to carry a mouse.
It has Android 6, which, well, requires some creativity to make it do useful things, but I just saw this as a challenge to overcome, rather than a dead-end. New models by Onyx have not just keyboards, but new versions of Android, which should even make some of the tricks in this file useless, but perhaps not all. Since I am definitely buying a new device on eInk after this one dies, I am partly writing this file for the common good, partly for my future self, to save time on setting up future devices.
It has 2Gb of RAM, which is petty even by the standards of 2017, when this eBook was still new, but, think about it, my computer from 1994 had 16 Megabytes, and could still play music, run text processors, print, check email, do instant messaging, browse the web, and such. We just need to learn how to unlock its creative potential.
There is a bigger problem though, that is the devices uses a 32-bit ARM CPU, which is not really good, does not let Emacs run with big-int mode (or maybe I haven’t found how to make it).
In this file I will write out some tweaks which I had to learn by trial and error, in order to make my life more palatable.
1. Download the installation files
https://sourceforge.net/projects/android-ports-for-gnu-emacs/
There is also a very useful README file, which is claimed to be binary by SourceForge, but do not believe them.
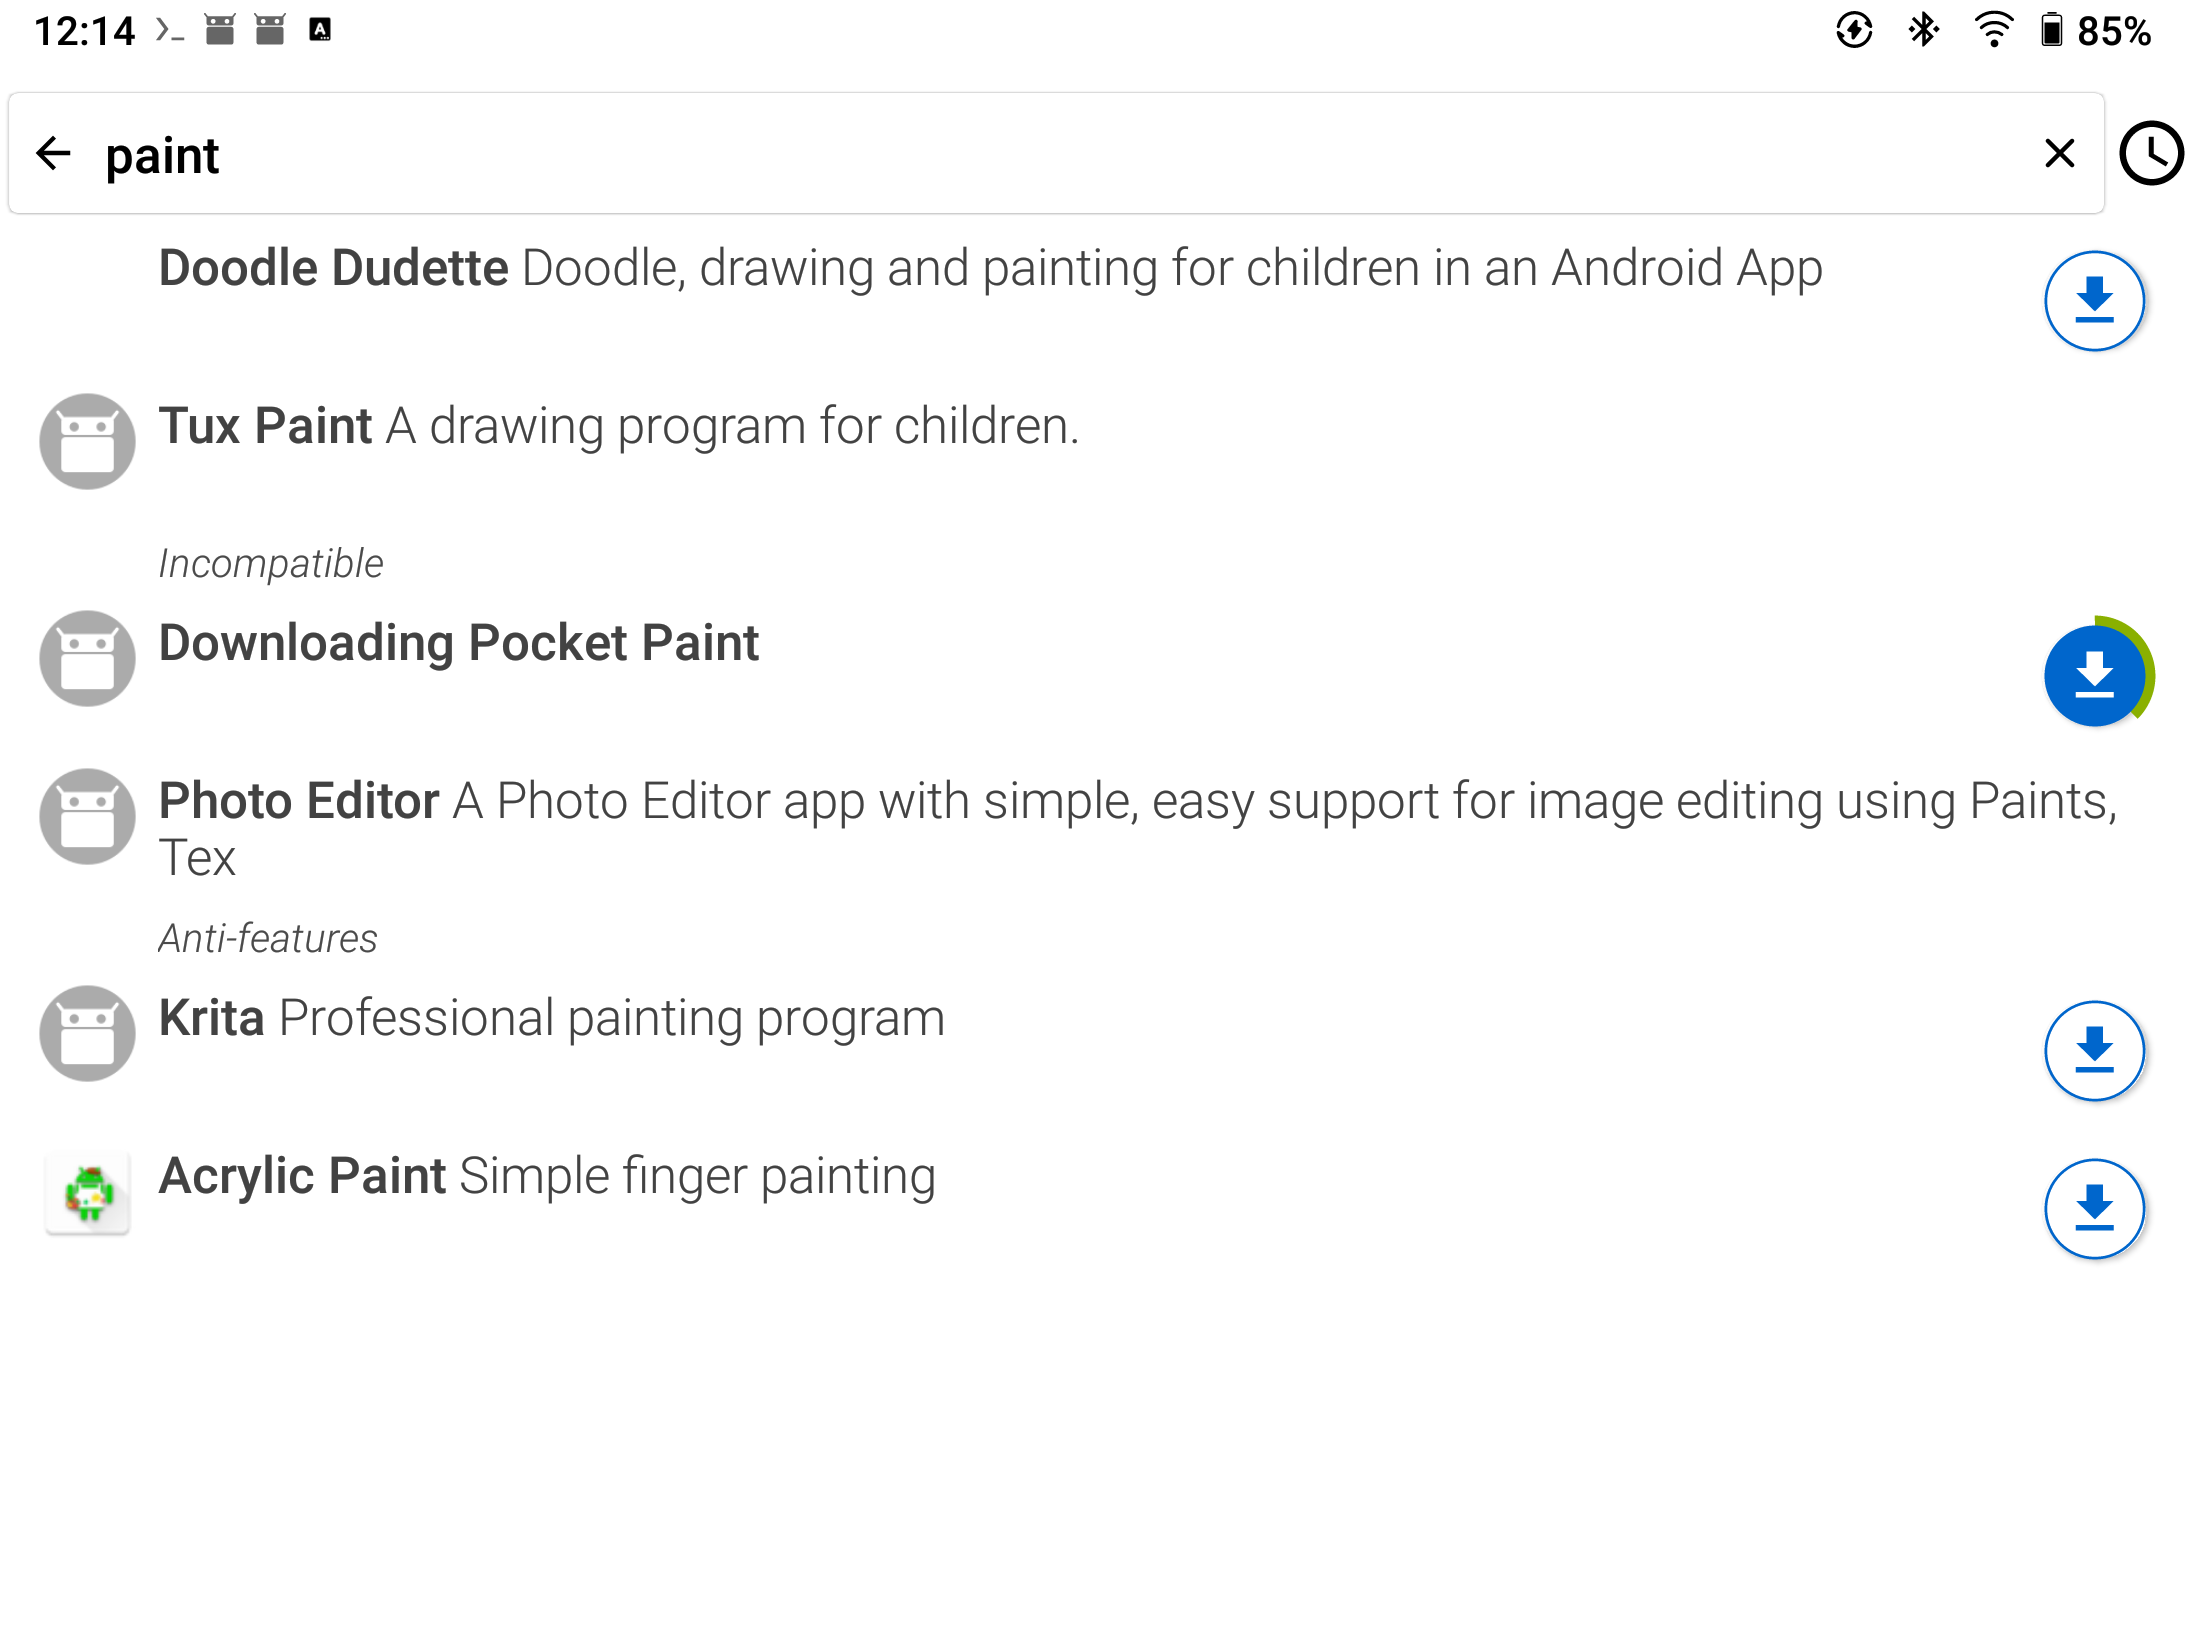
2. Install F-Droid.
F-Droid still works with Android 6, and this is how we will be getting most (but not all) of our software.
3. Install Syncthing (or Syncthing-Fork).
Again, very curiously, but Syncthing works on Android. The disk on the eBook is tiny, so I just share it entirely with the Laptop, so my question of sharing data with the eBook does not arise.
You might want to play with “.stignore” files if you have some “directory shared with multiple devices”.
4. Buy a keyboard and learn input methods.
I have bought a Logitech “Ultrathin Keyboard Folio”, which fits into a stock case provided together with the eBook.
The eBook works with Bluetooth just fine.
Now Android has this weird concept of “Keyboard Apps”, which means that there is no way to input anything directly into the system, everything goes through an input method.
Now learn the following keys:
- ⬠ - return to home screen
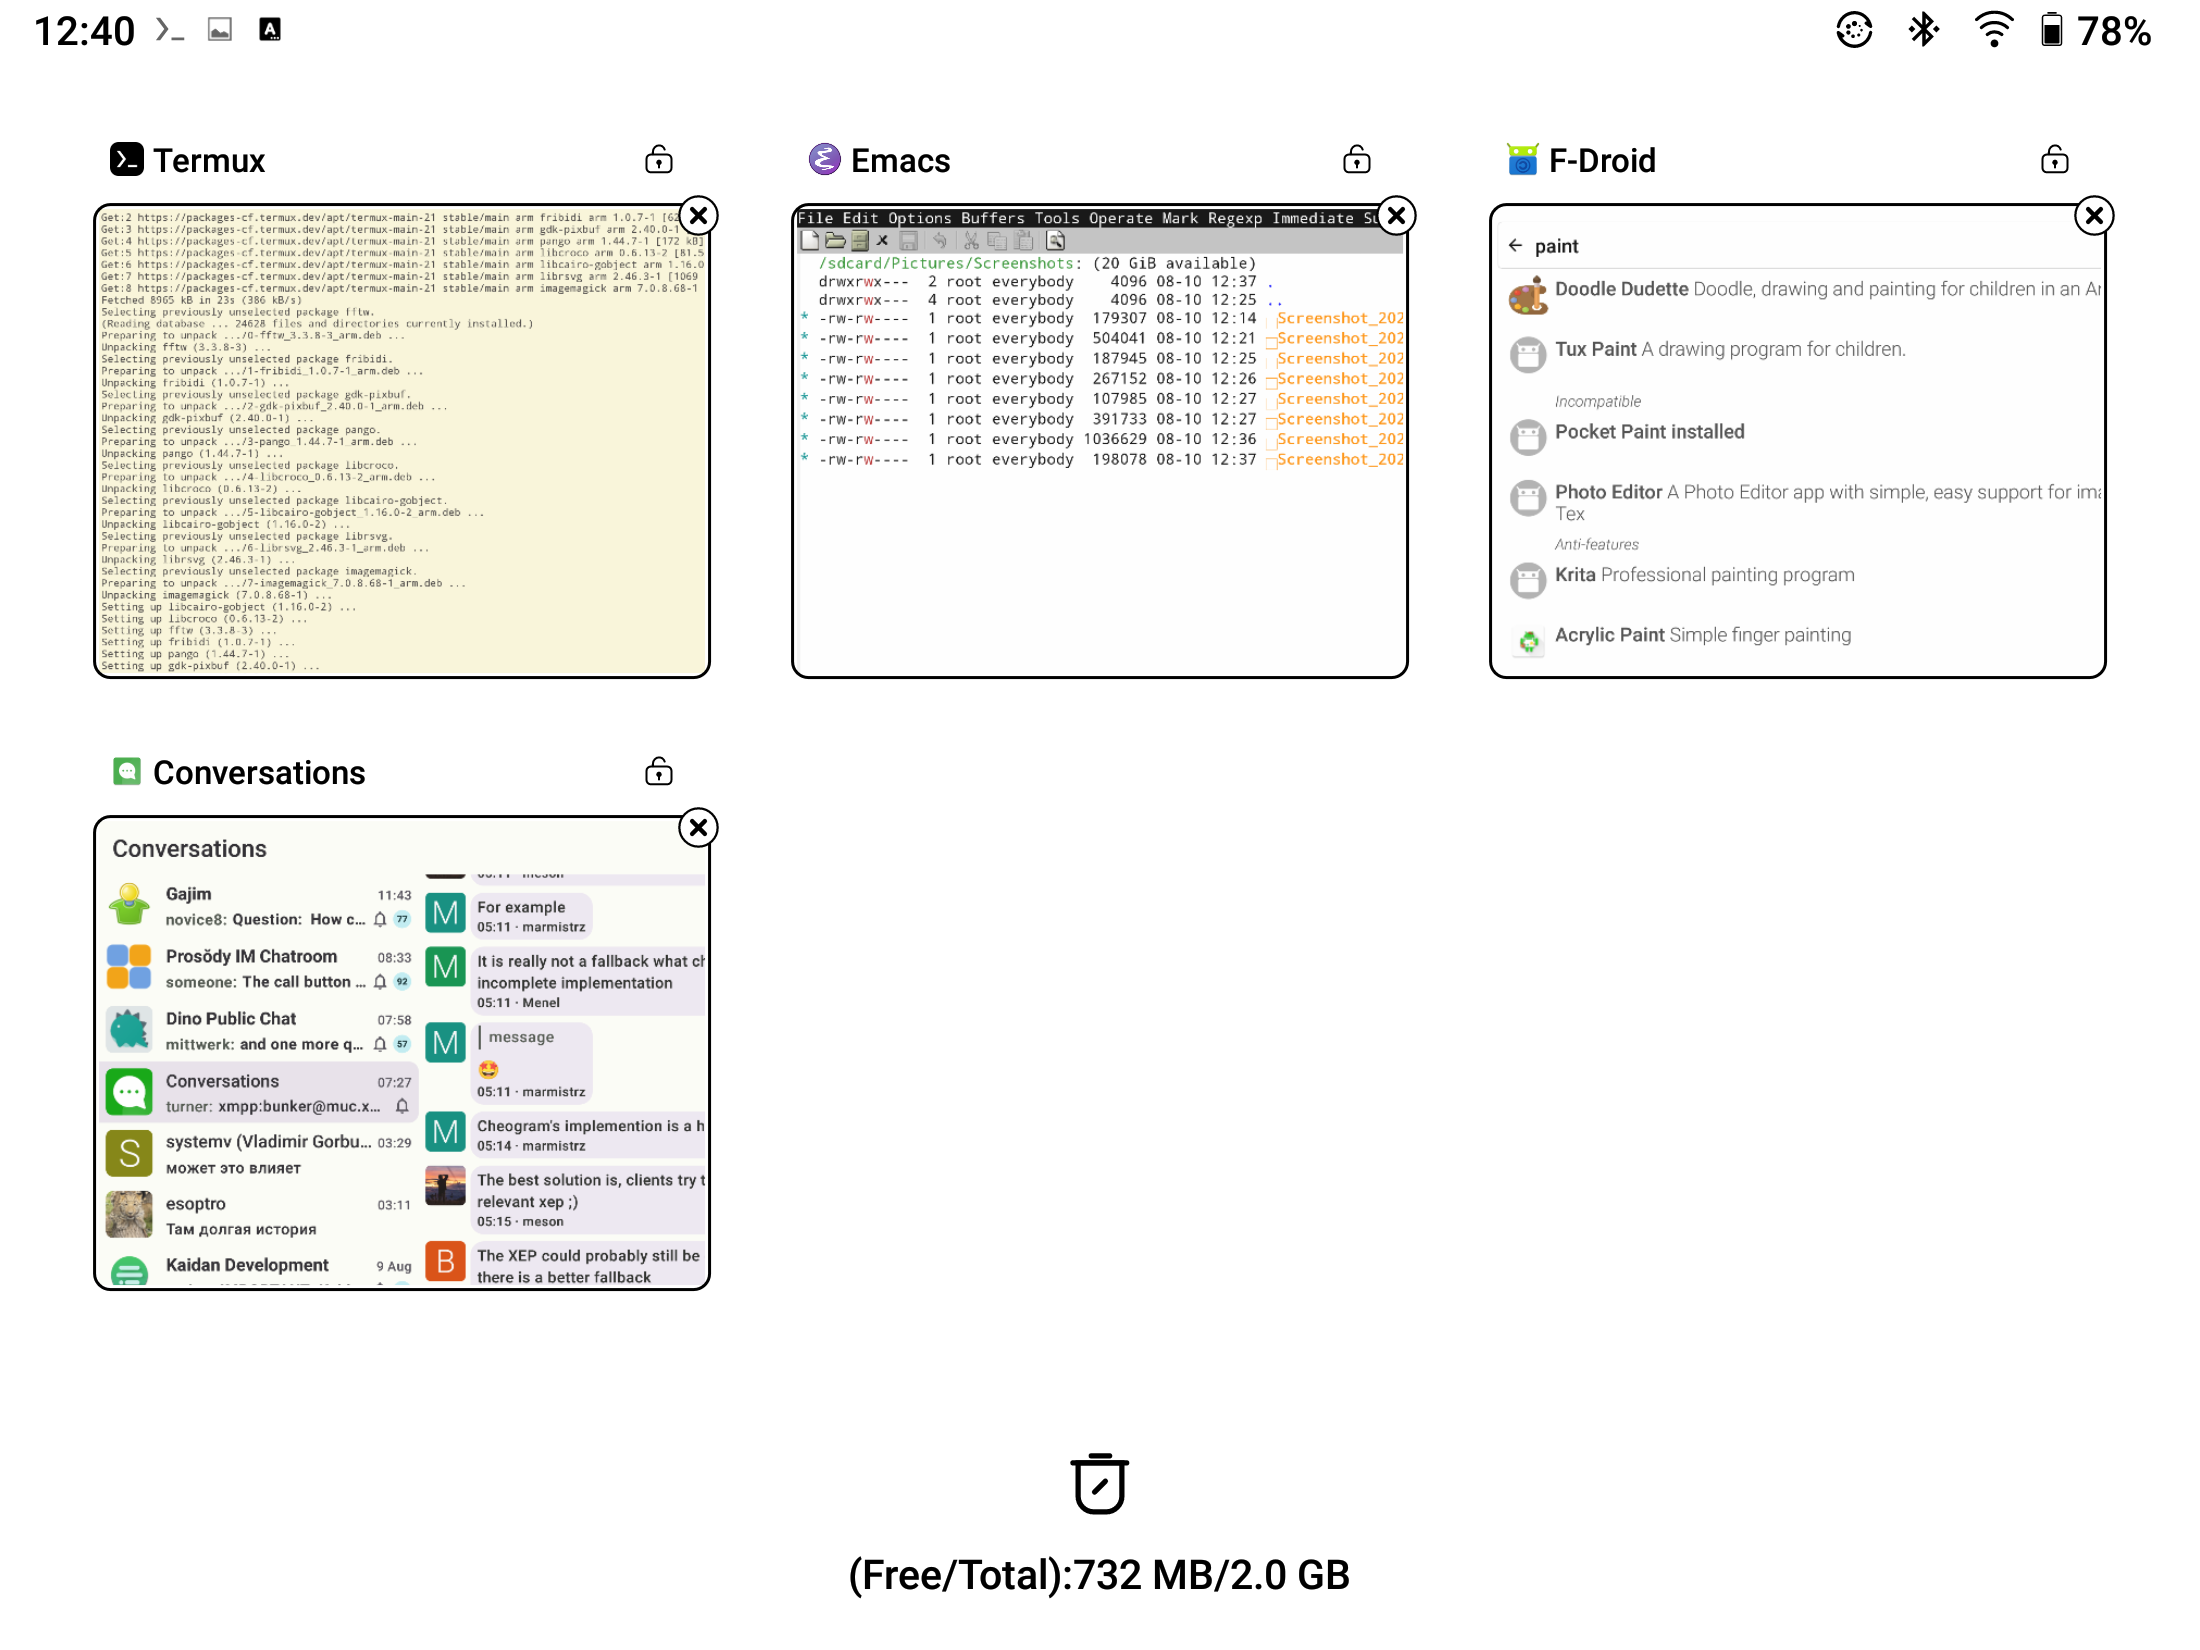
- ❒ - window list
- ≣ - standard menu
- Fn - switches the feature of Escape, Backspace, Battery, and keys.
- Windows Logo - apparently does nothing
- 🔍 - default search, on Emacs produces non-incremental search
This is enough for most useful tasks. Ctrl+C/Ctrl+V work for most Android tasks.
4.1. Basic input method
The most basic input method we have on Onyx Boox Max 2 is “Android Keyboard”, and you can set it up to input Latin and Cyrillic, without ever showing the virtual keyboard.
Layouts are switched with Ctrl+Space. If you are used to “Russian-typewriter”, I have bad news for you, it’s not there, but many others are.
“Android Keyboard” has something called “Chinese”, but I haven’t managed to make it input anything but Latin, and a single pinyin character, using Alt and a back-tick as a combining diacritic.
4.2. Install fcitx5.
Okay, I need Chinese input on my device, and I didn’t manage to make the stock Onyx Keyboard input what I wanted to input.
So I installed fcitx5-android from F-Droid. Fcitx5 is even recommended by Emacs developers.
It only works for Chinese and English, and its English support is not good, but it does the job.
I have set its virtual keyboard size to the minimal height, so that it would not occupy too much space, but I think there needs to be a way to hide the buttons completely, and only leave the suggestion line.
I have enabled “preedit” in fcitx5, and it just works, hiding the onscreen keyboard and offering me a candidates popup.
You can switch between “Android Keyboard” languages with Ctrl+Space , but I have not found a way to switch between “Android Keyboard” and Fcitx5 with a keystroke.
So far, since I seldom use Russian+Chinese, I end up tapping the persistent notification in the Android notification menu, and switching keyboards with a tap, but there must be a better way.
I found a way to make things convenient:
- Fcitx5->Advanced->Export Config->Save (the Save button is not visible on eink, but it’s on the right of the file name .zip in the bottom)
- Open the zip file with Emacs and find the file called “config”.
- There is a section there called
[Hotkey/Toggle], which is not editable from the GUI. - Replace some obscure Hangul keys with Ctrl+Alt+O. Only some keys work, for example, Ctrl+Alt+\ does not work. Save.
- Fcitx5->Advanced->Import Config->Select the edited .zip file.
Now Ctrl+space switches between Russian and English, and Ctrl+Alt+O switches between English and Chinese. Profit.
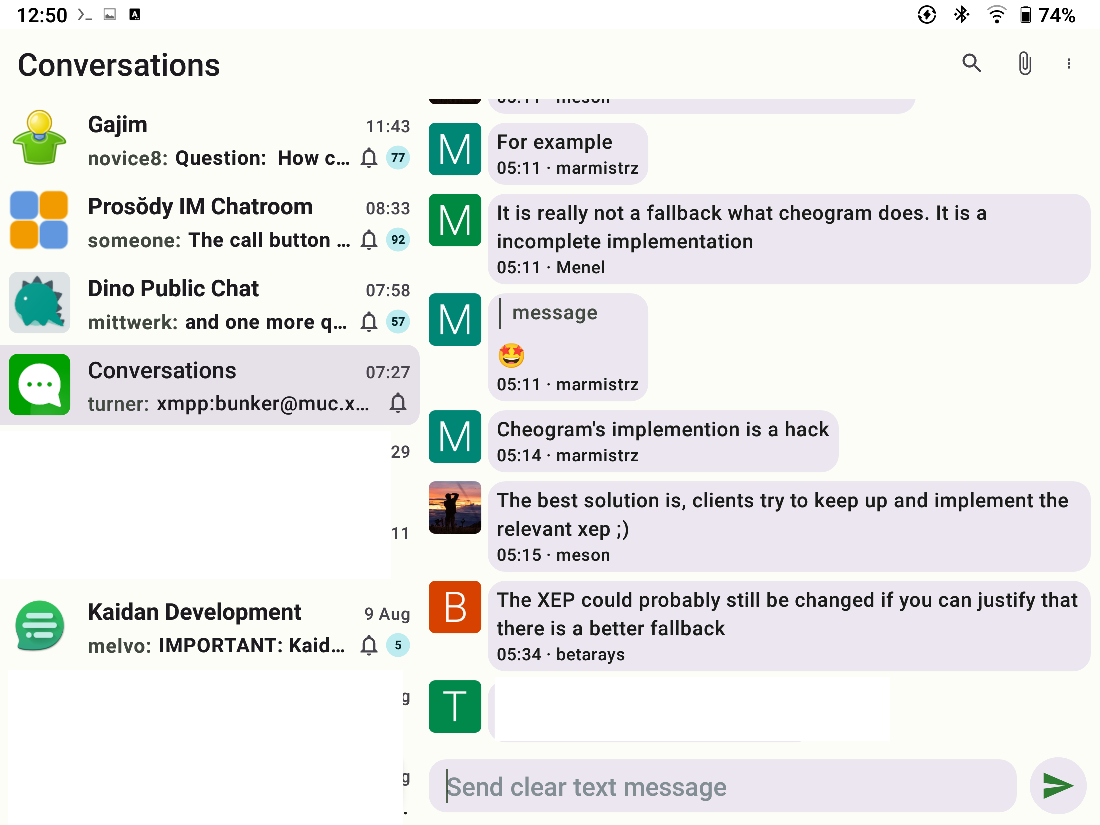
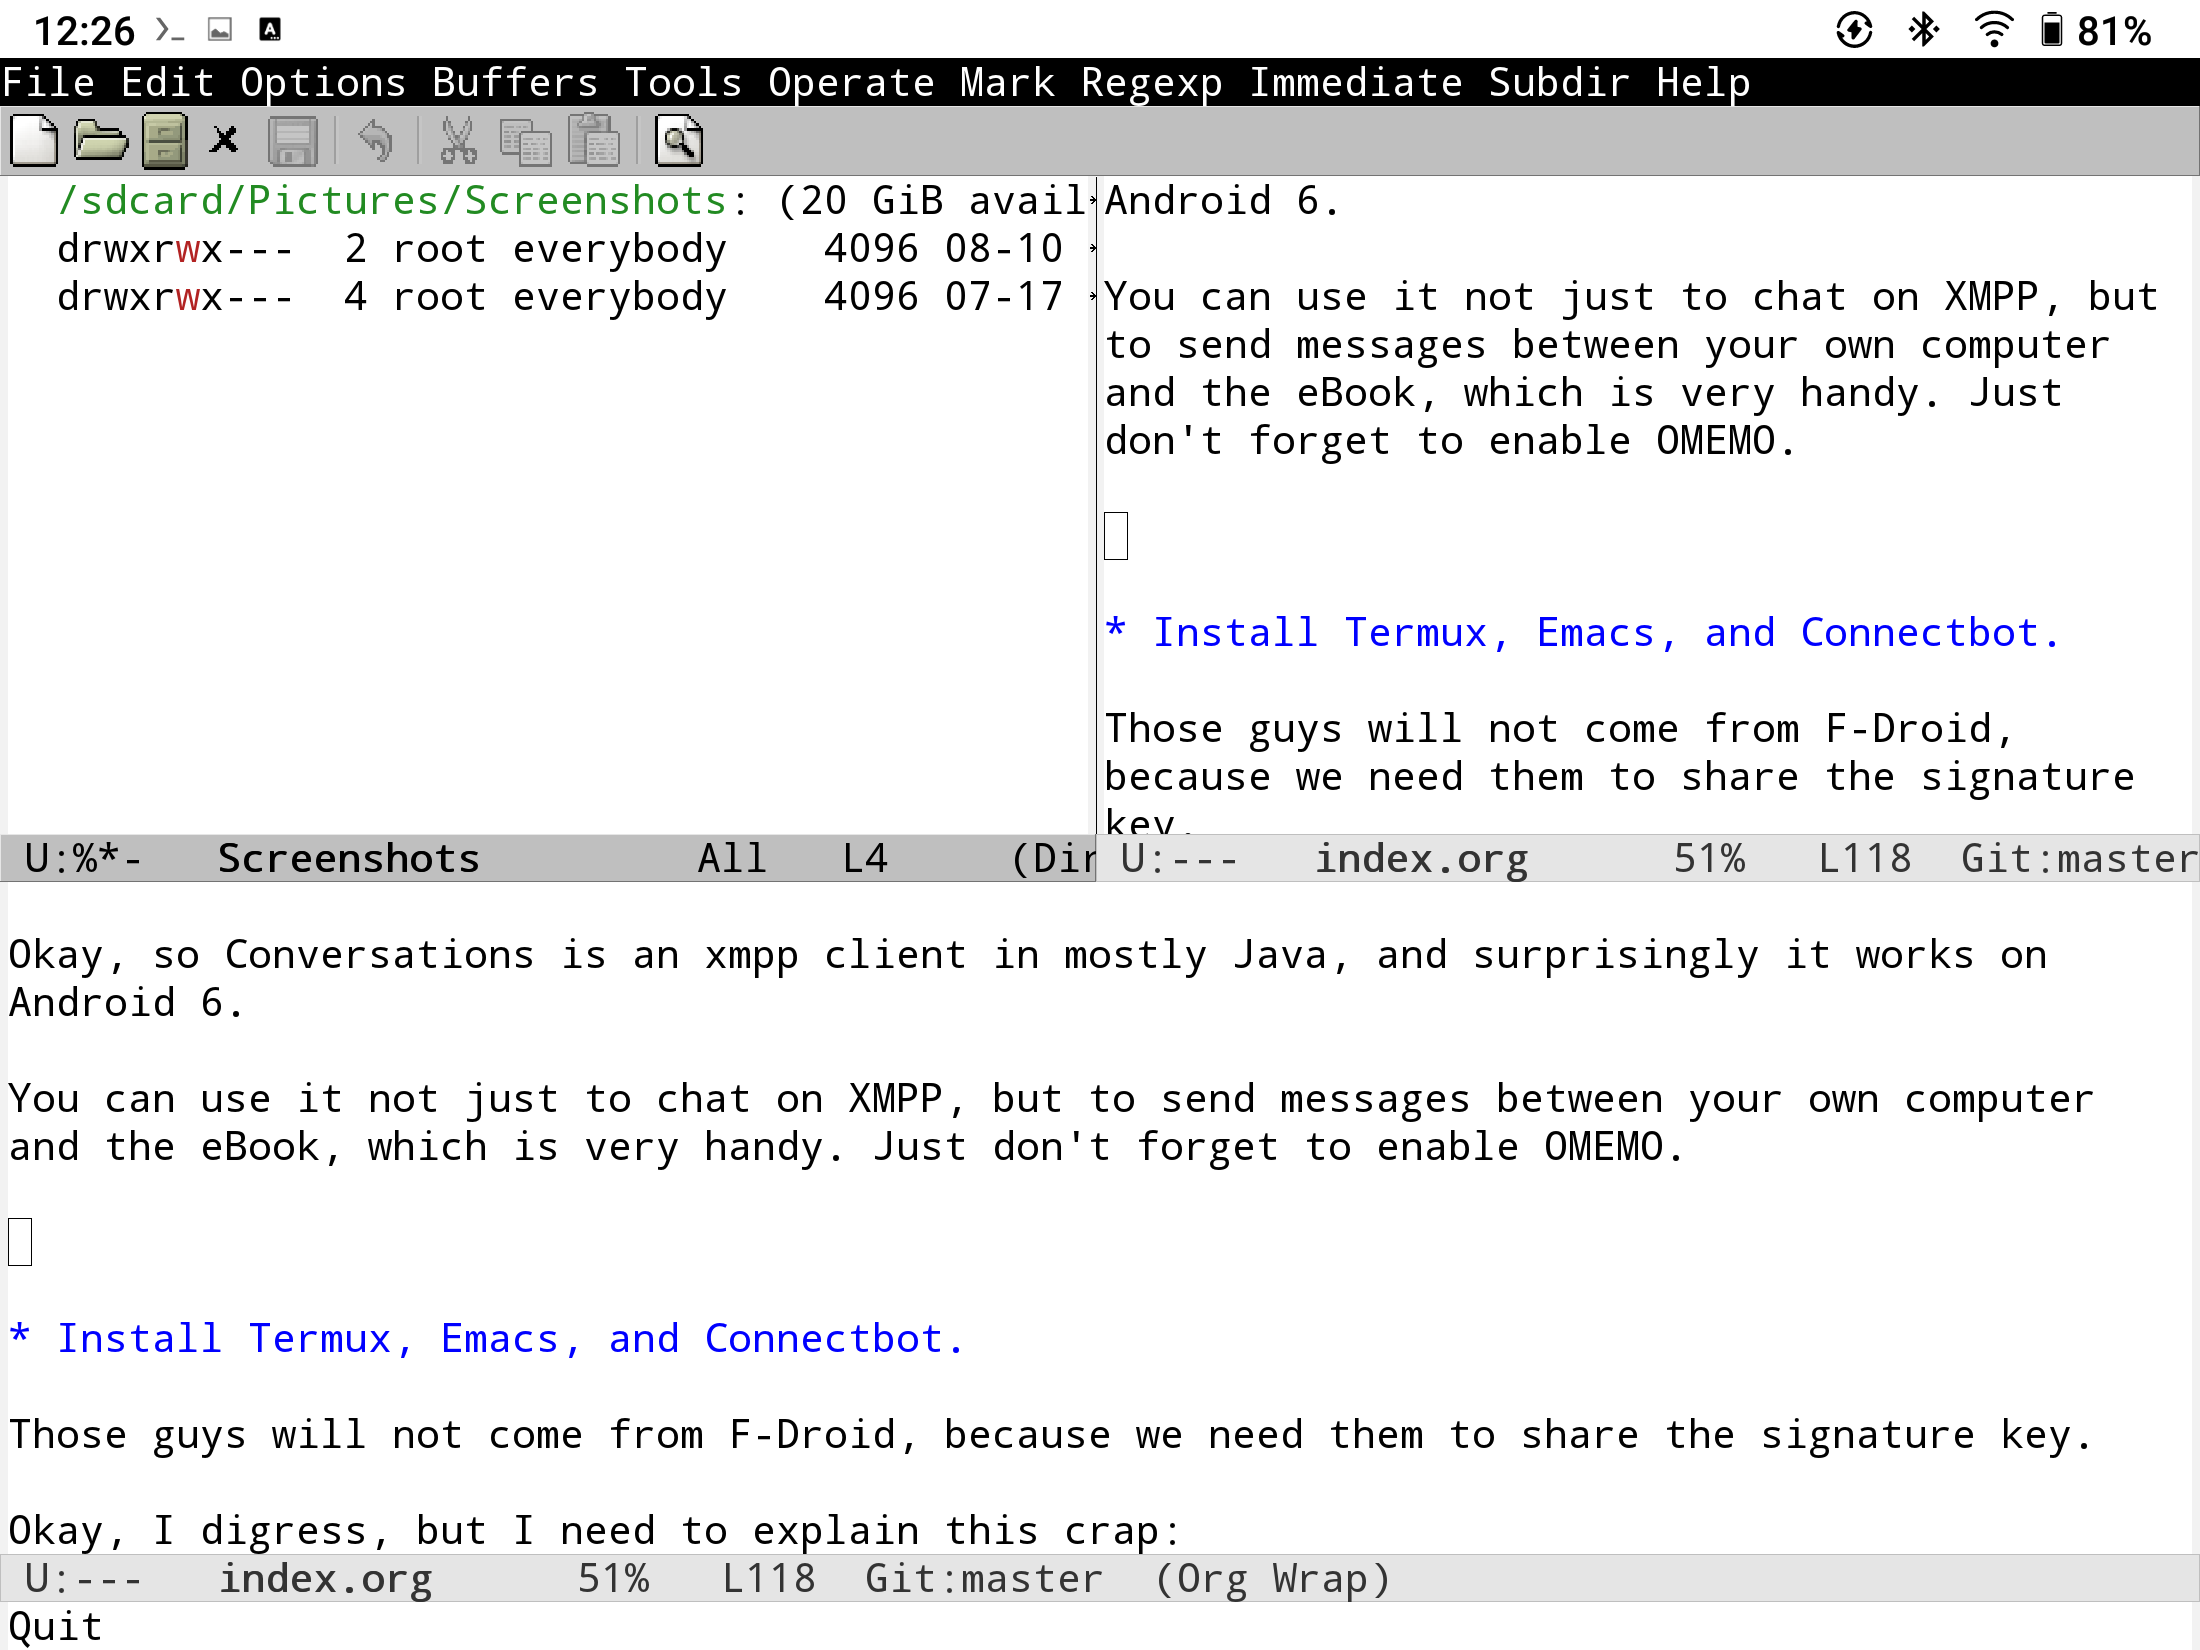
5. Install Conversations from F-Droid.
Okay, so Conversations is an xmpp client in mostly Java, and surprisingly it works on Android 6.
You can use it not just to chat on XMPP, but to send messages between your own computer and the eBook, which is very handy. Just don’t forget to enable OMEMO.
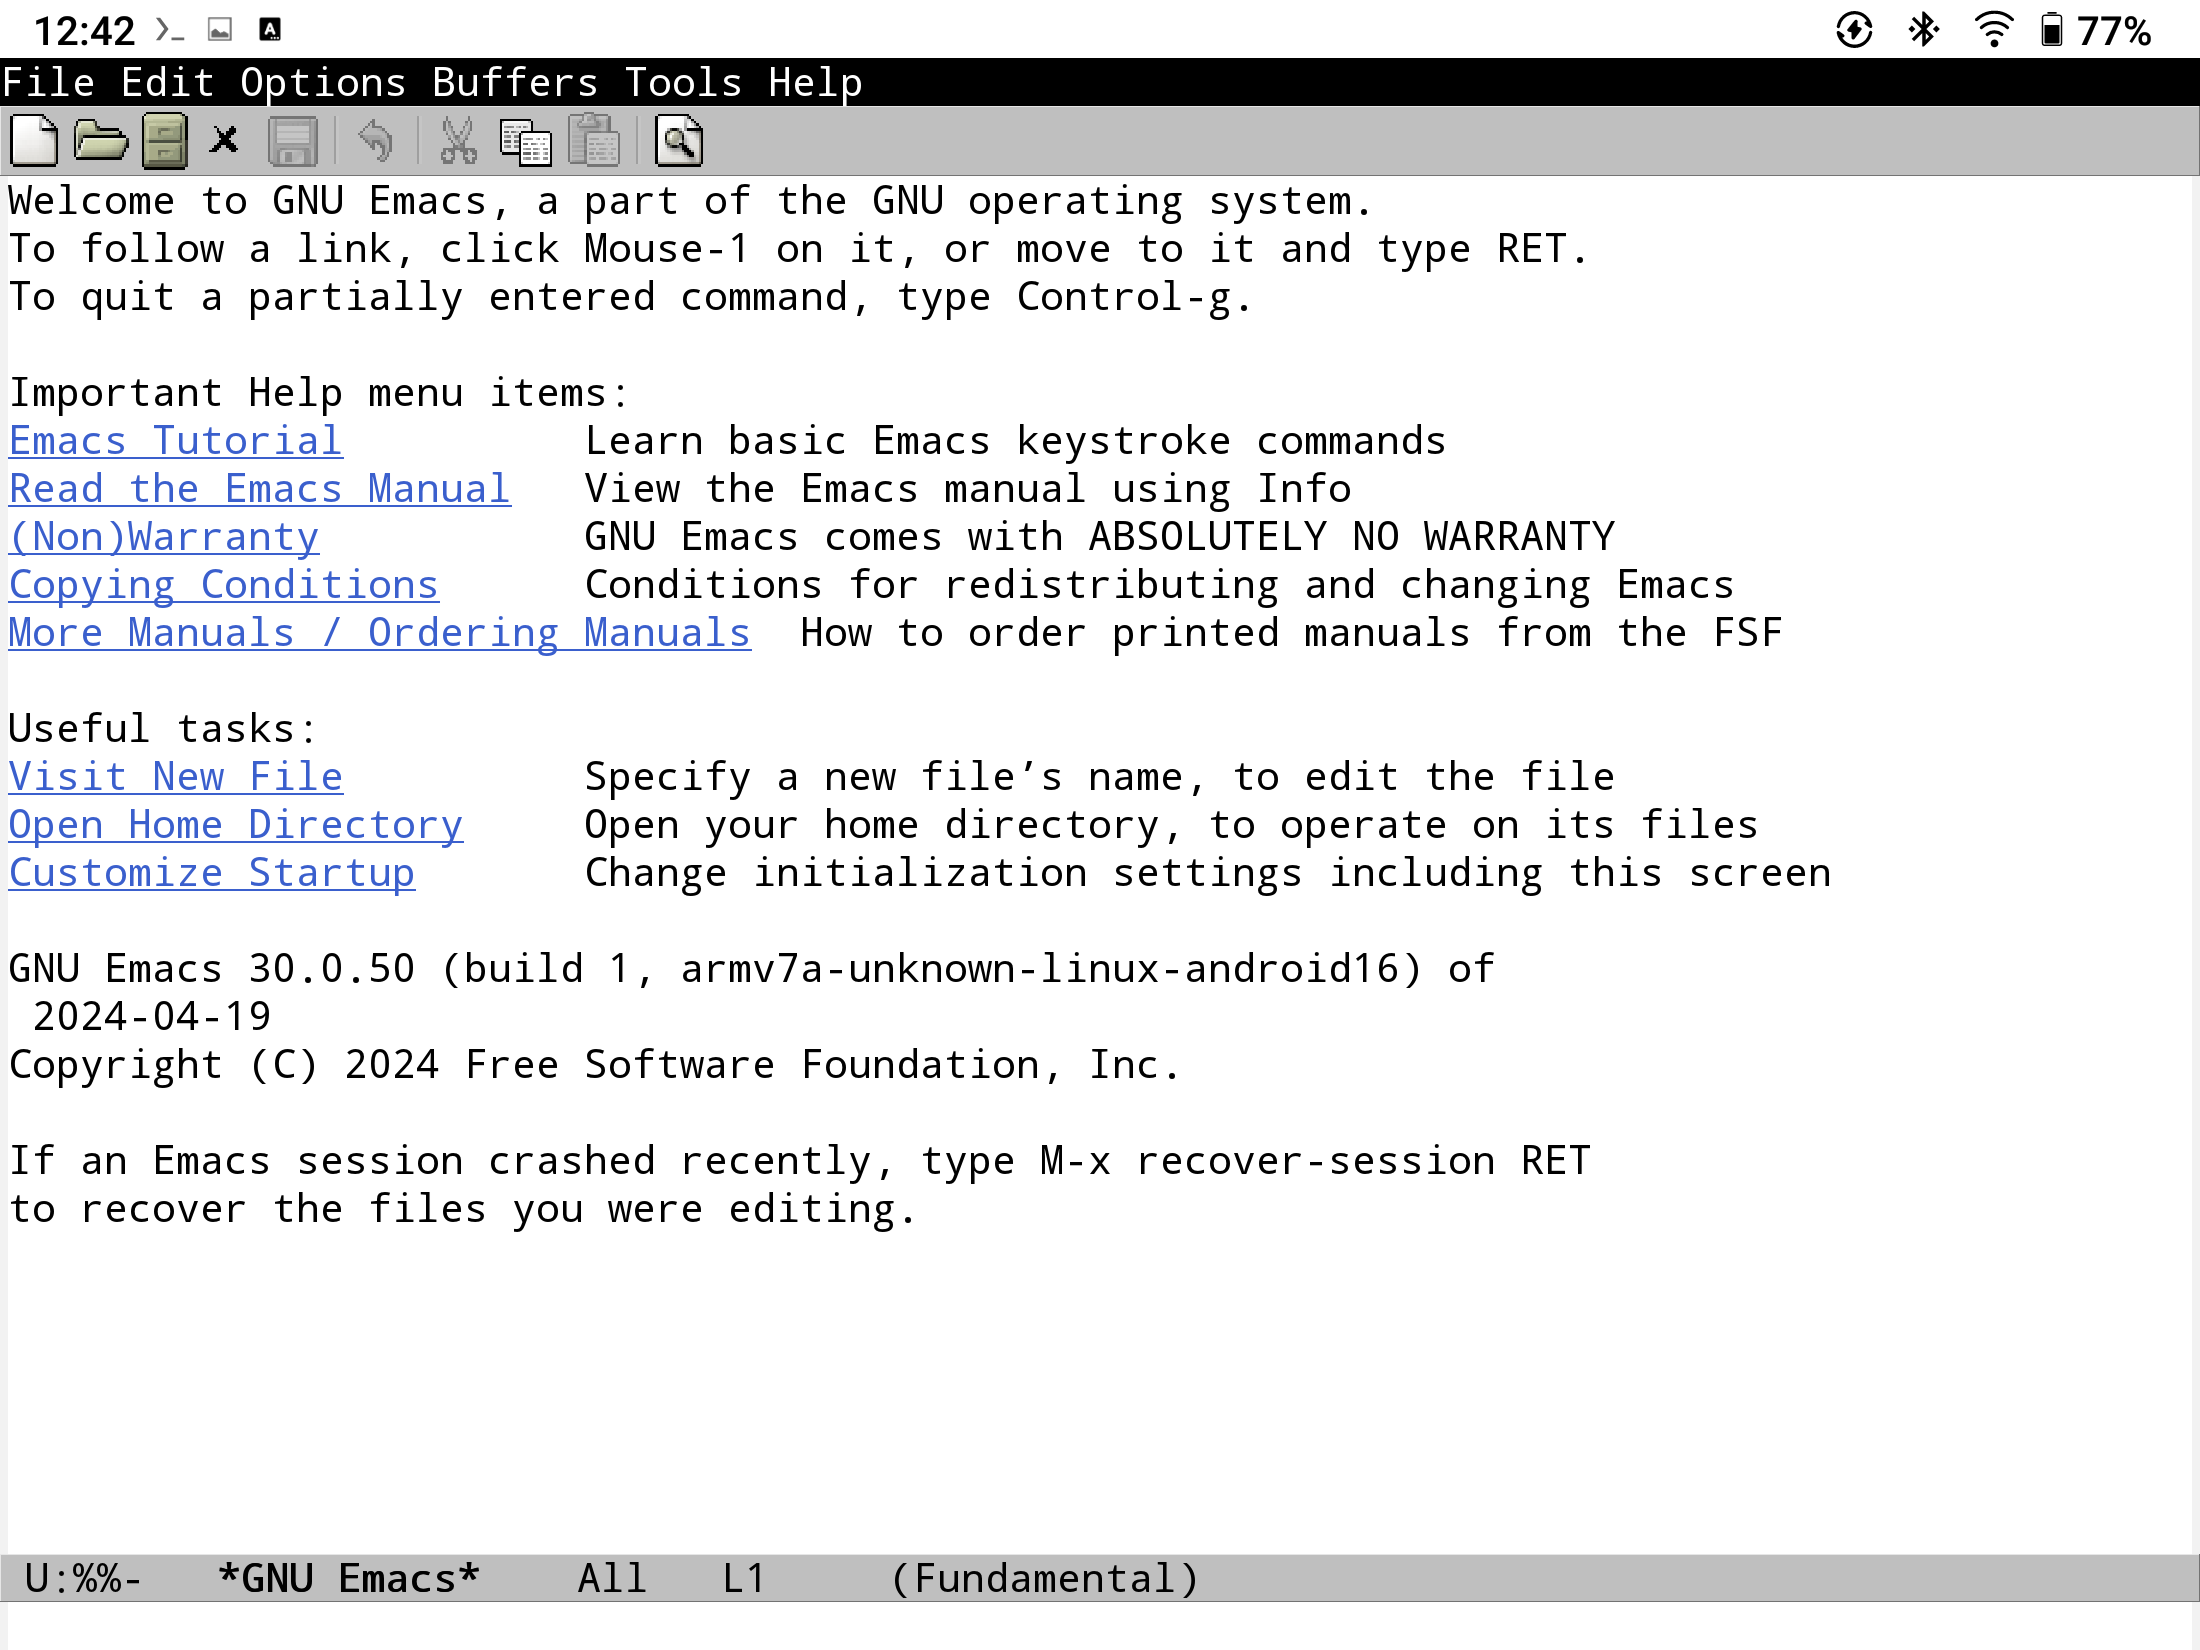
6. Install Termux, Emacs, and Connectbot.
Those guys will not come from F-Droid, because we need them to share the signature key.
Okay, I digress, but I need to explain this crap:
Android requires that apks be signed with a key. The key does not actually provide anti-tampering features, but it ensures that “apps signed with different keys do not overwrite each other”. Moreover, apps sharing a user-id can read each other’s data. Emacs for Android 6 and Termux app do not share an ID, even though we really need this!
So, download Emacs apk, and Termux-for-Android-6 apk, use apktool to unpack them both, add a shared user ID, and re-sign with a key. Sign with any key, I just use jarsigner with the default Android developer key.
Same thing works with Connectbot, except that you need to add an LD_LIBRARY_PATH in order to use termux apps. You also need to do the same with Emacs in order to use termux apps from Emacs Shell.
Here are the code snippets:
apktool d "$CWD"/source/termux-app_v0.118.0+2f40df9-apt-android-5-github-debug_armeabi-v7a.apk
apktool b termux-app_v0.118.0+2f40df9-apt-android-5-github-debug_armeabi-v7a -o "$CWD"/output/termux_for_emacs.apk
# password is android
jarsigner -storepass "android" -verbose -sigalg SHA1withRSA -digestalg SHA1 -keystore ~/.android/debug.keystore "$CWD"/output/termux_for_emacs.apk androiddebugkey

apktool d $CWD/source/emacs-30.0.50-16-armeabi-v7a.apk
sed -i 's|android:requestLegacyExternalStorage|android:sharedUserId="com.termux" android:sharedUserLabel="@string/shared_user_label" android:requestLegacyExternalStorage|g' emacs-30.0.50-16-armeabi-v7a/AndroidManifest.xml
sed -i '/shared_user_name/i<string name="shared_user_label">Termux user</string>' emacs-30.0.50-16-armeabi-v7a/res/values/strings.xml
apktool b emacs-30.0.50-16-armeabi-v7a -o "$CWD"/output/emacs_for_termux.apk
jarsigner -storepass "android"  -verbose -sigalg SHA1withRSA -digestalg SHA1 -keystore ~/.android/debug.keystore "$CWD"/output/emacs_for_termux.apk androiddebugkey
Update 2026-04-13: Not exactly e-book related, but installing Emacs on an Android 16 in 2026 requires a bit of jumping through hoops too.
It is not possible to re-sign Emacs with the f-droid key, since it is not public, but it is possible to re-sign the Emacs apk with the Termux github key (look at their github).
But re-signing the emacs apk needs to be done with apksigner.jar, not with jarsigner, and signature version 2 must be used.
Same thing works with Connectbot. I like Connectbot, because it lets me run scripts from a menu, with a tap, just needing to set up a profile.
Important The GPG key termux packages has expired, you need to import it manually.
git clone https://github.com/termux/termux-packages/
adb push termux-packages/packages/termux-keyring/grimler.gpg /sdcard/Download
termux-setup-storage
cp /sdcard/Download/grimler.gpg /data/data/com.termux/files/usr/etc/apt/trusted.gpg.d
Now you can install stuff on termux, and use it from Emacs’s shell-mode.
Things INSTANTLY become more fun.
Now to make things simpler, at once install on termux:
- hunspell*,
- tmux,
- ssh,
- gpg*,
- git,
- gcc*
- ghostscript
And on Emacs:
- magit
- pdf-tools
On Emacs, open shell, and make “~/.ssh” a symlink to “data/data/com.termux/files/home.ssh”. Also, add tmux’s “usr” to Emacs’ PATH.
(when (string-equal system-type "android")
  ;; Add Termux binaries to PATH environment
  (let ((termuxpath "/data/data/com.termux/files/usr/bin"))
    (setenv "PATH" (concat (getenv "PATH") ":" termuxpath))
    (setenv "LD_LIBRARY_PATH" "/data/data/com.termux/files/usr/lib")
    (setq exec-path (append exec-path (list termuxpath)))))
You can also input Chines using standard Emacs’ built-in input method, although it is not very swift.
I also added my own tiny input method to input toneful pinyin:
(require 'quail)

(quail-define-package
 "pinyin-tone-marks" "UTF-8" "PY<" t
 "Pinyin input method with tone marks."
 nil t nil nil nil nil nil nil nil nil t)

;; Define rules for tone marks
(quail-define-rules
 ("a1" ?ā) ("a2" ?á) ("a3" ?ǎ) ("a4" ?à)
 ("e1" ?ē) ("e2" ?é) ("e3" ?ě) ("e4" ?è)
 ("i1" ?ī) ("i2" ?í) ("i3" ?ǐ) ("i4" ?ì)
 ("o1" ?ō) ("o2" ?ó) ("o3" ?ǒ) ("o4" ?ò)
 ("u1" ?ū) ("u2" ?ú) ("u3" ?ǔ) ("u4" ?ù)
 ("v1" ?ǖ) ("v2" ?ǘ) ("v3" ?ǚ) ("v4" ?ǜ)
 ("1" "1") ("2" "2") ("3" "3") ("4" "4"))

(defun lockywolf/turn-on-pinyin ()
  (interactive)
  (set-input-method "pinyin-tone-marks"))
(defun lockywolf/turn-on-chinese-simplified ()
  (interactive)
  (set-input-method "chinese-py"))
(defun lockywolf/turn-on-chinese-traditional ()
  (interactive)
  (set-input-method "chinese-py-b5"))

(global-set-key (kbd "C-` 1") 'lockywolf/turn-on-pinyin)
(global-set-key (kbd "C-` 2") 'lockywolf/turn-on-chinese-simplified)
(global-set-key (kbd "C-` 3") 'lockywolf/turn-on-chinese-traditional)
It is better to have this input as a part of Emacs. I am not sure whether it is easy to input pinyin with fcitx or other Android input methods.
Okay, now we have GCC 9, clang 9, and ssh 8.1
This is not really fresh, but not bad either.
This howto is not about using UNIX command-line and Emacs, but you must be see where I am getting. It should be now possible to use tmux to bootstrap a lot of useful stuff.
But in any case, if you configure ssh’s config to reach you home laptop, you can basically do whatever you want on your home laptop in console. This already makes it workable.
You can use my own lwf_rtmux (https://gitlab.com/Lockywolf/linuxbugs-lwf/-/blob/master/scripts/2021-06-18_lwf-rtmux.bash), to make your connections persistent, although the XPRA part does not work. Also, since Android’s ksh is a bit stupid and has no /dev/stderr, error messages are a little worse.
Some screenshots:
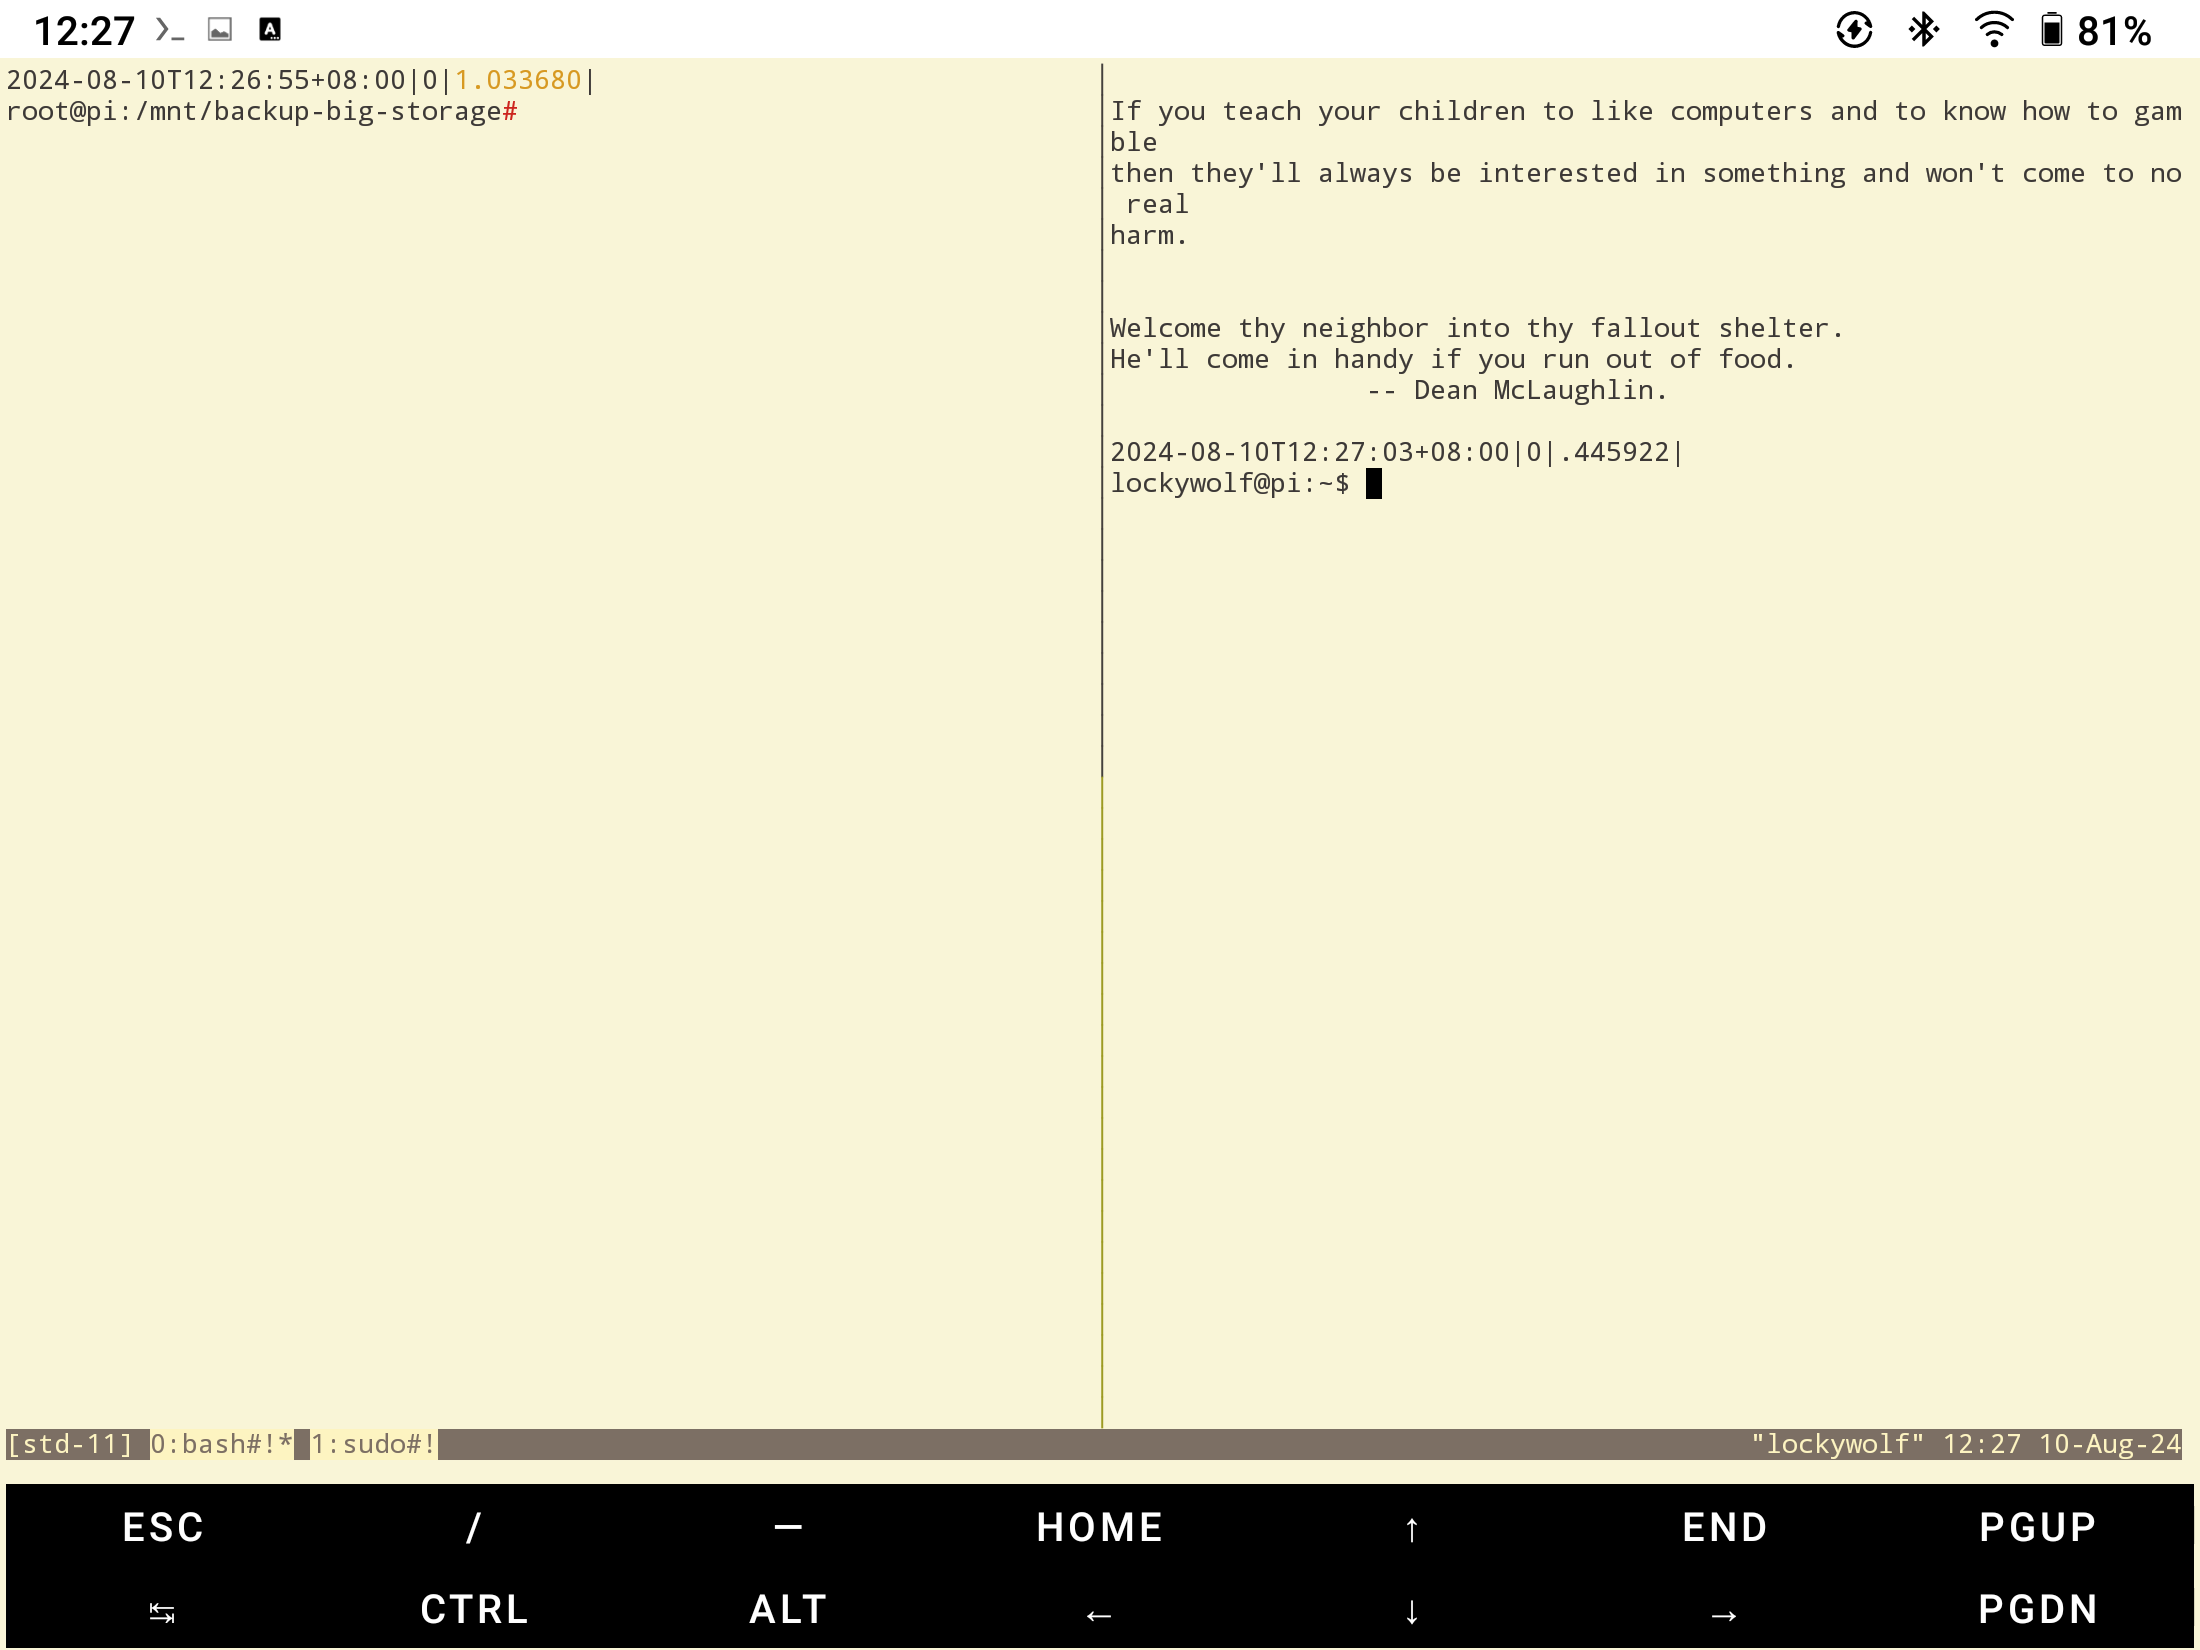
6.0.1. Dark/light theme in termux.
By default termux works in dark mode, which is a real pain with an eInk display.
I used adi1090/termux-style, but you can do it with Termux:Style, if you find how to install build it.
Of you can tweak ~/.termux/colors.properties
and maybe also ~/.termux/.current_color
https://reddit.com/r/termux/comments/tu1aq8/customizing_termux_colors/
echo 'gruvbox-light.properties' > /data/data/com.termux/.termux/.current_color
! hard contrast: background: #f9f5d7
background: #f9f5d7
! background: #fbf1c7
! soft contrast: background: #f2e5bc
foreground: #3c3836
! Black + DarkGrey
color0:  #fdf4c1
color8:  #928374
! DarkRed + Red
color1:  #cc241d
color9:  #9d0006
! DarkGreen + Green
color2:  #98971a
color10: #79740e
! DarkYellow + Yellow
color3:  #d79921
color11: #b57614
! DarkBlue + Blue
color4:  #458588
color12: #076678
! DarkMagenta + Magenta
color5:  #b16286
color13: #8f3f71
! DarkCyan + Cyan
color6:  #689d6a
color14: #427b58
! LightGrey + White
color7:  #7c6f64
color15: #3c3836
6.0.2. Proper fonts in Emacs
But default Emacs will use whichever fonts it will find on your Android. In my case font coverage ended up being decent, in that it had:
- Chinese
- English
- Cyrillic
But it did not have nice Unicode pictogramms, and no obscure scripts, such as the Book of Change symbols, which were used in some books I was reading.
So here is how to add them back: copy files
- Symbola.ttf
- 霞鹜文楷-Regular.ttf
into ~/.emacs.d/fonts
Emacs font system is not that straightforward, see emacs#Android Fonts .
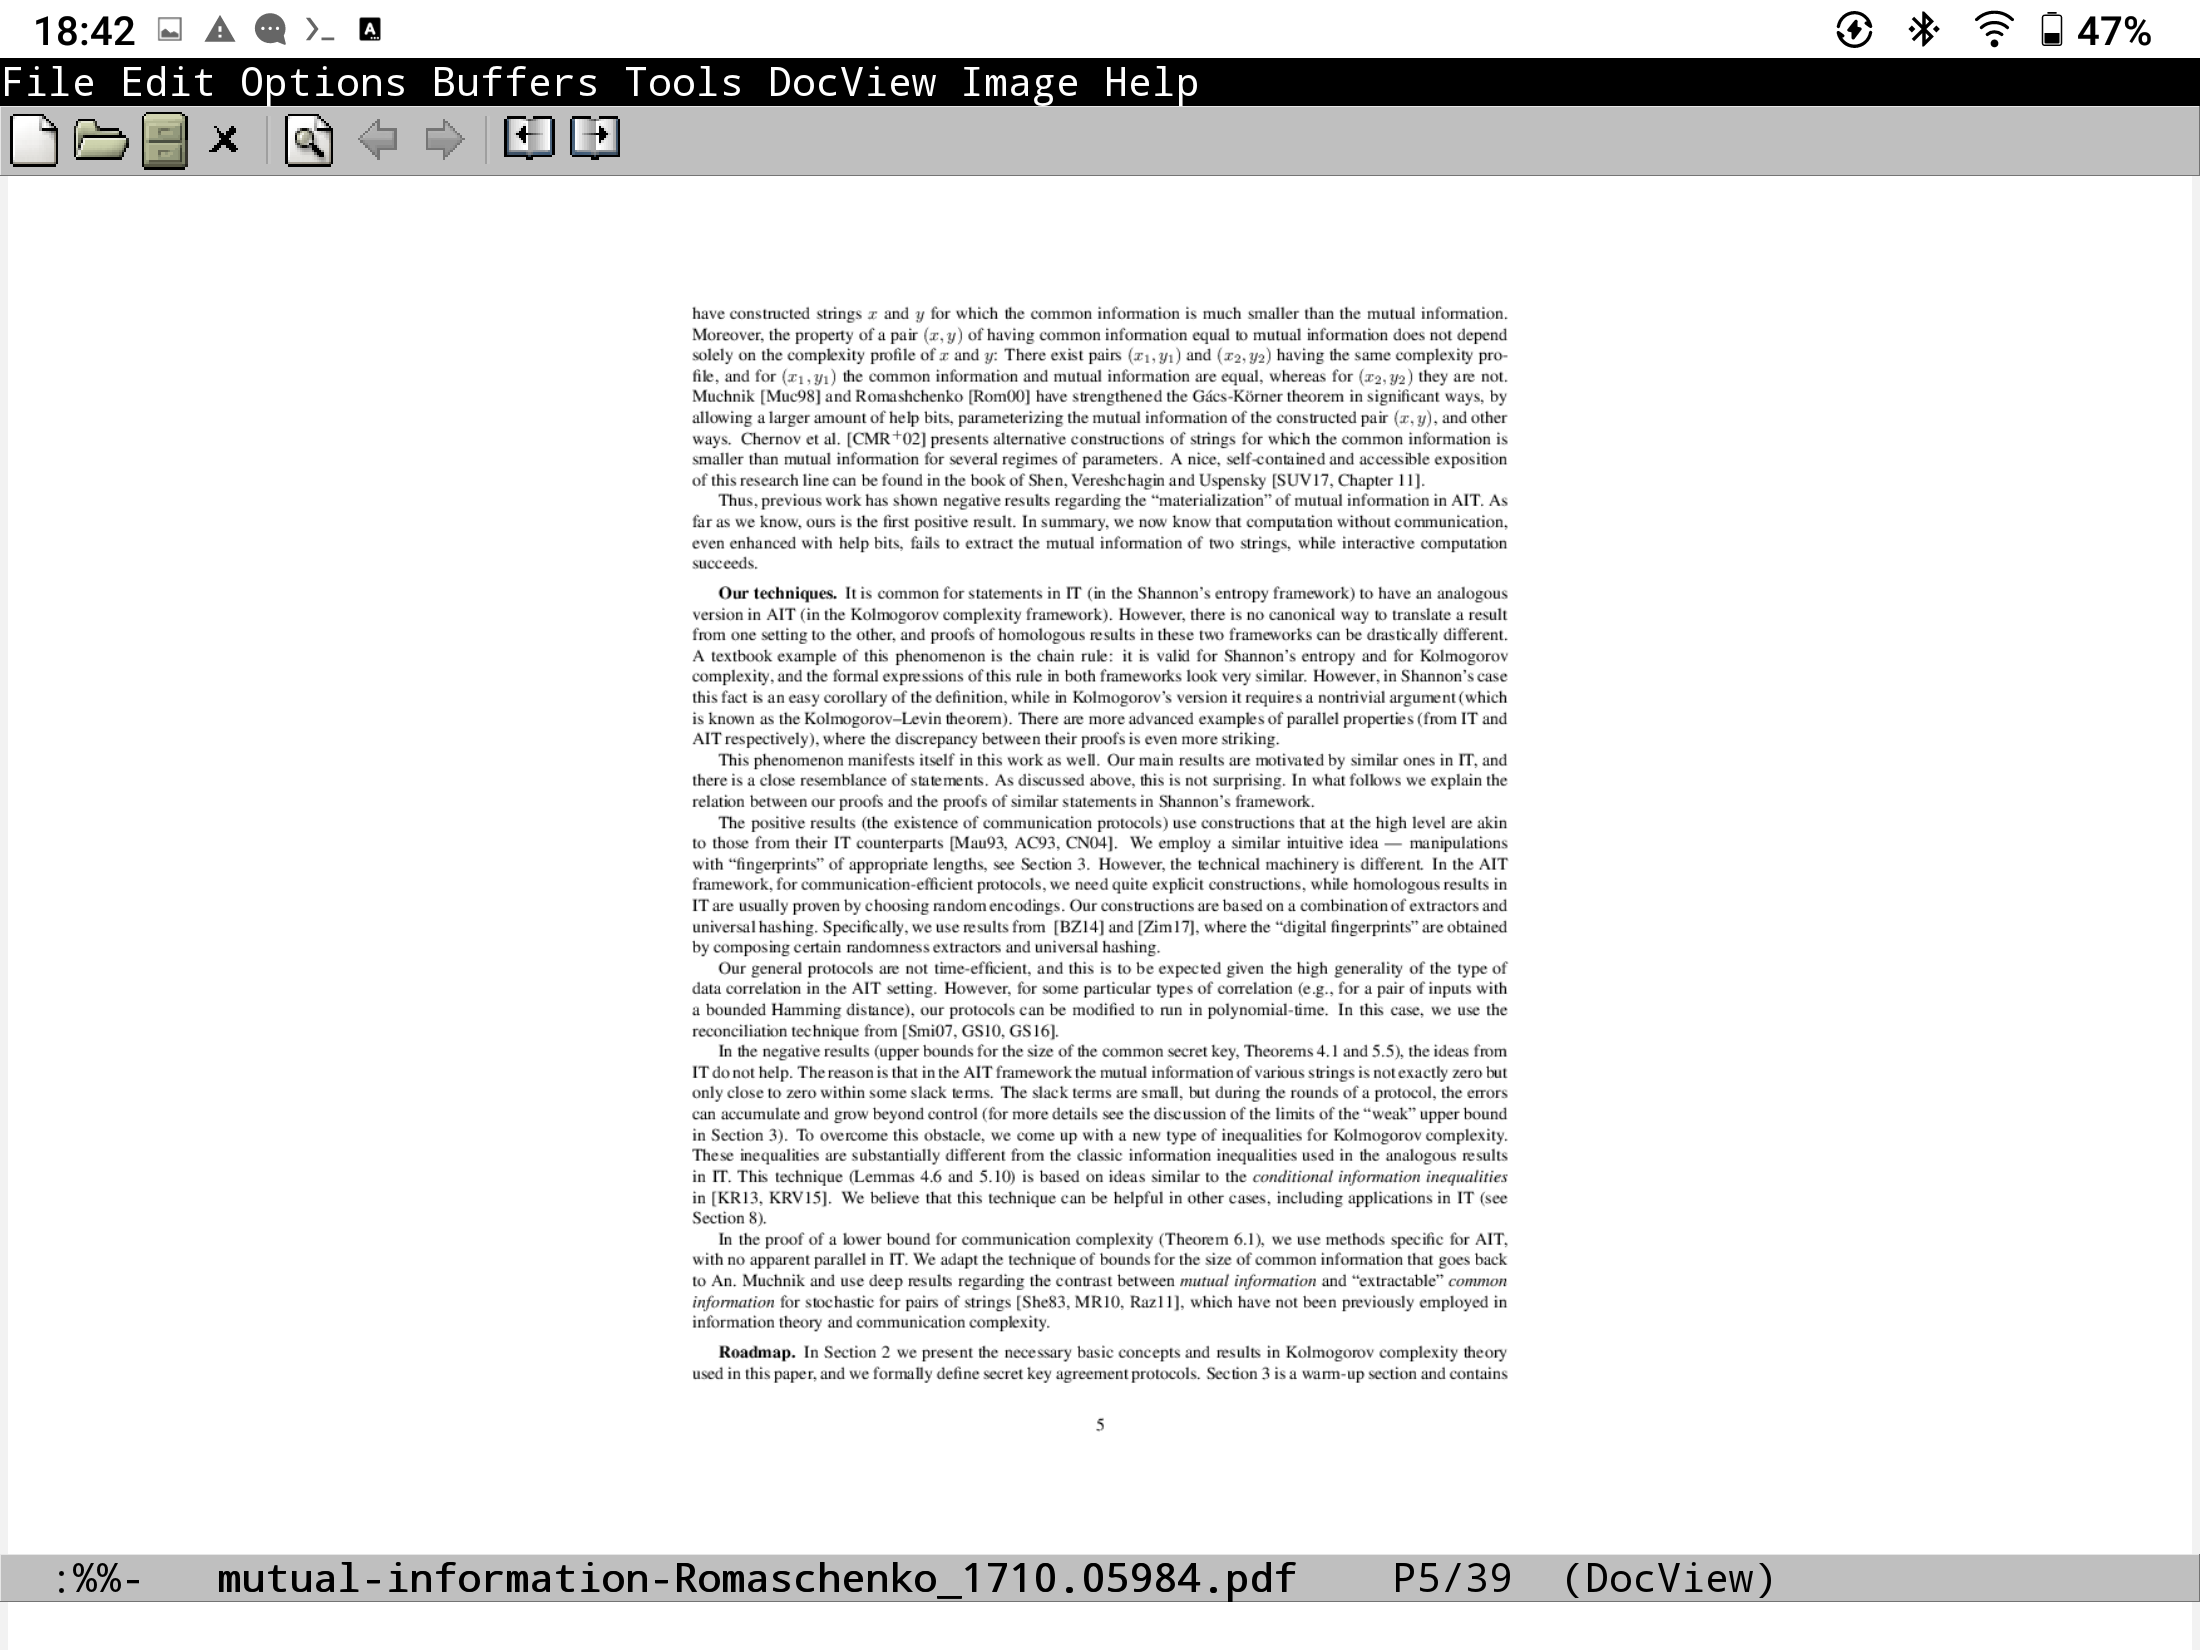
6.1. doc-view mode
If you install ghostscript, doc-view mode works, and even is quite fast.
I fact I wrote the section on 8.3 before making doc-view mode work, otherwise I might avoid learning Neoreader entirely. (Not really, since it’s Onyx’ flagship product, so deserves attention anyway.)
6.2. pdf-tools
pdf-tools can compile and run on Boox Max, but the efficiency is poor: Emacs runs out of memory and starts to misbehave. (You would need to compile epdfinfo from termux, and not from Emacs’ shell, because the autobuild script uses the default shell, which is ksh on Emacs, and does not support some shell features that autobuild needs.)
6.2.1. Fix pdf-tools
I still do not recommend using pdf-tools for reading books in Emacs, because even though I have managed to make pdf-tools work fairly decently, I have not managed to make annotations work. But I have also never used annotations properly on the desktop Emacs, and overall consider pdf annotations to be an ill practice, because modifying the source is clearly more practical than making some sort of a weird overlay.
Below is the snippet which I have added to the init.el, which makes pdf-view-mode a bit slower, but still good enough for viewing pdfs compiled with auctex/termux.
(pdf-tools-install)
(setf pdf-cache-image-limit 0)
(setq-default pdf-view-display-size 'fit-height)
(setq-default pdf-view-max-image-width 2000)
(setq-default pdf-cache-image-inihibit t)
(advice-add 'pdf-view-redisplay :before #'clear-image-cache)
(advice-add 'pdf-view-redisplay :after #'clear-image-cache)
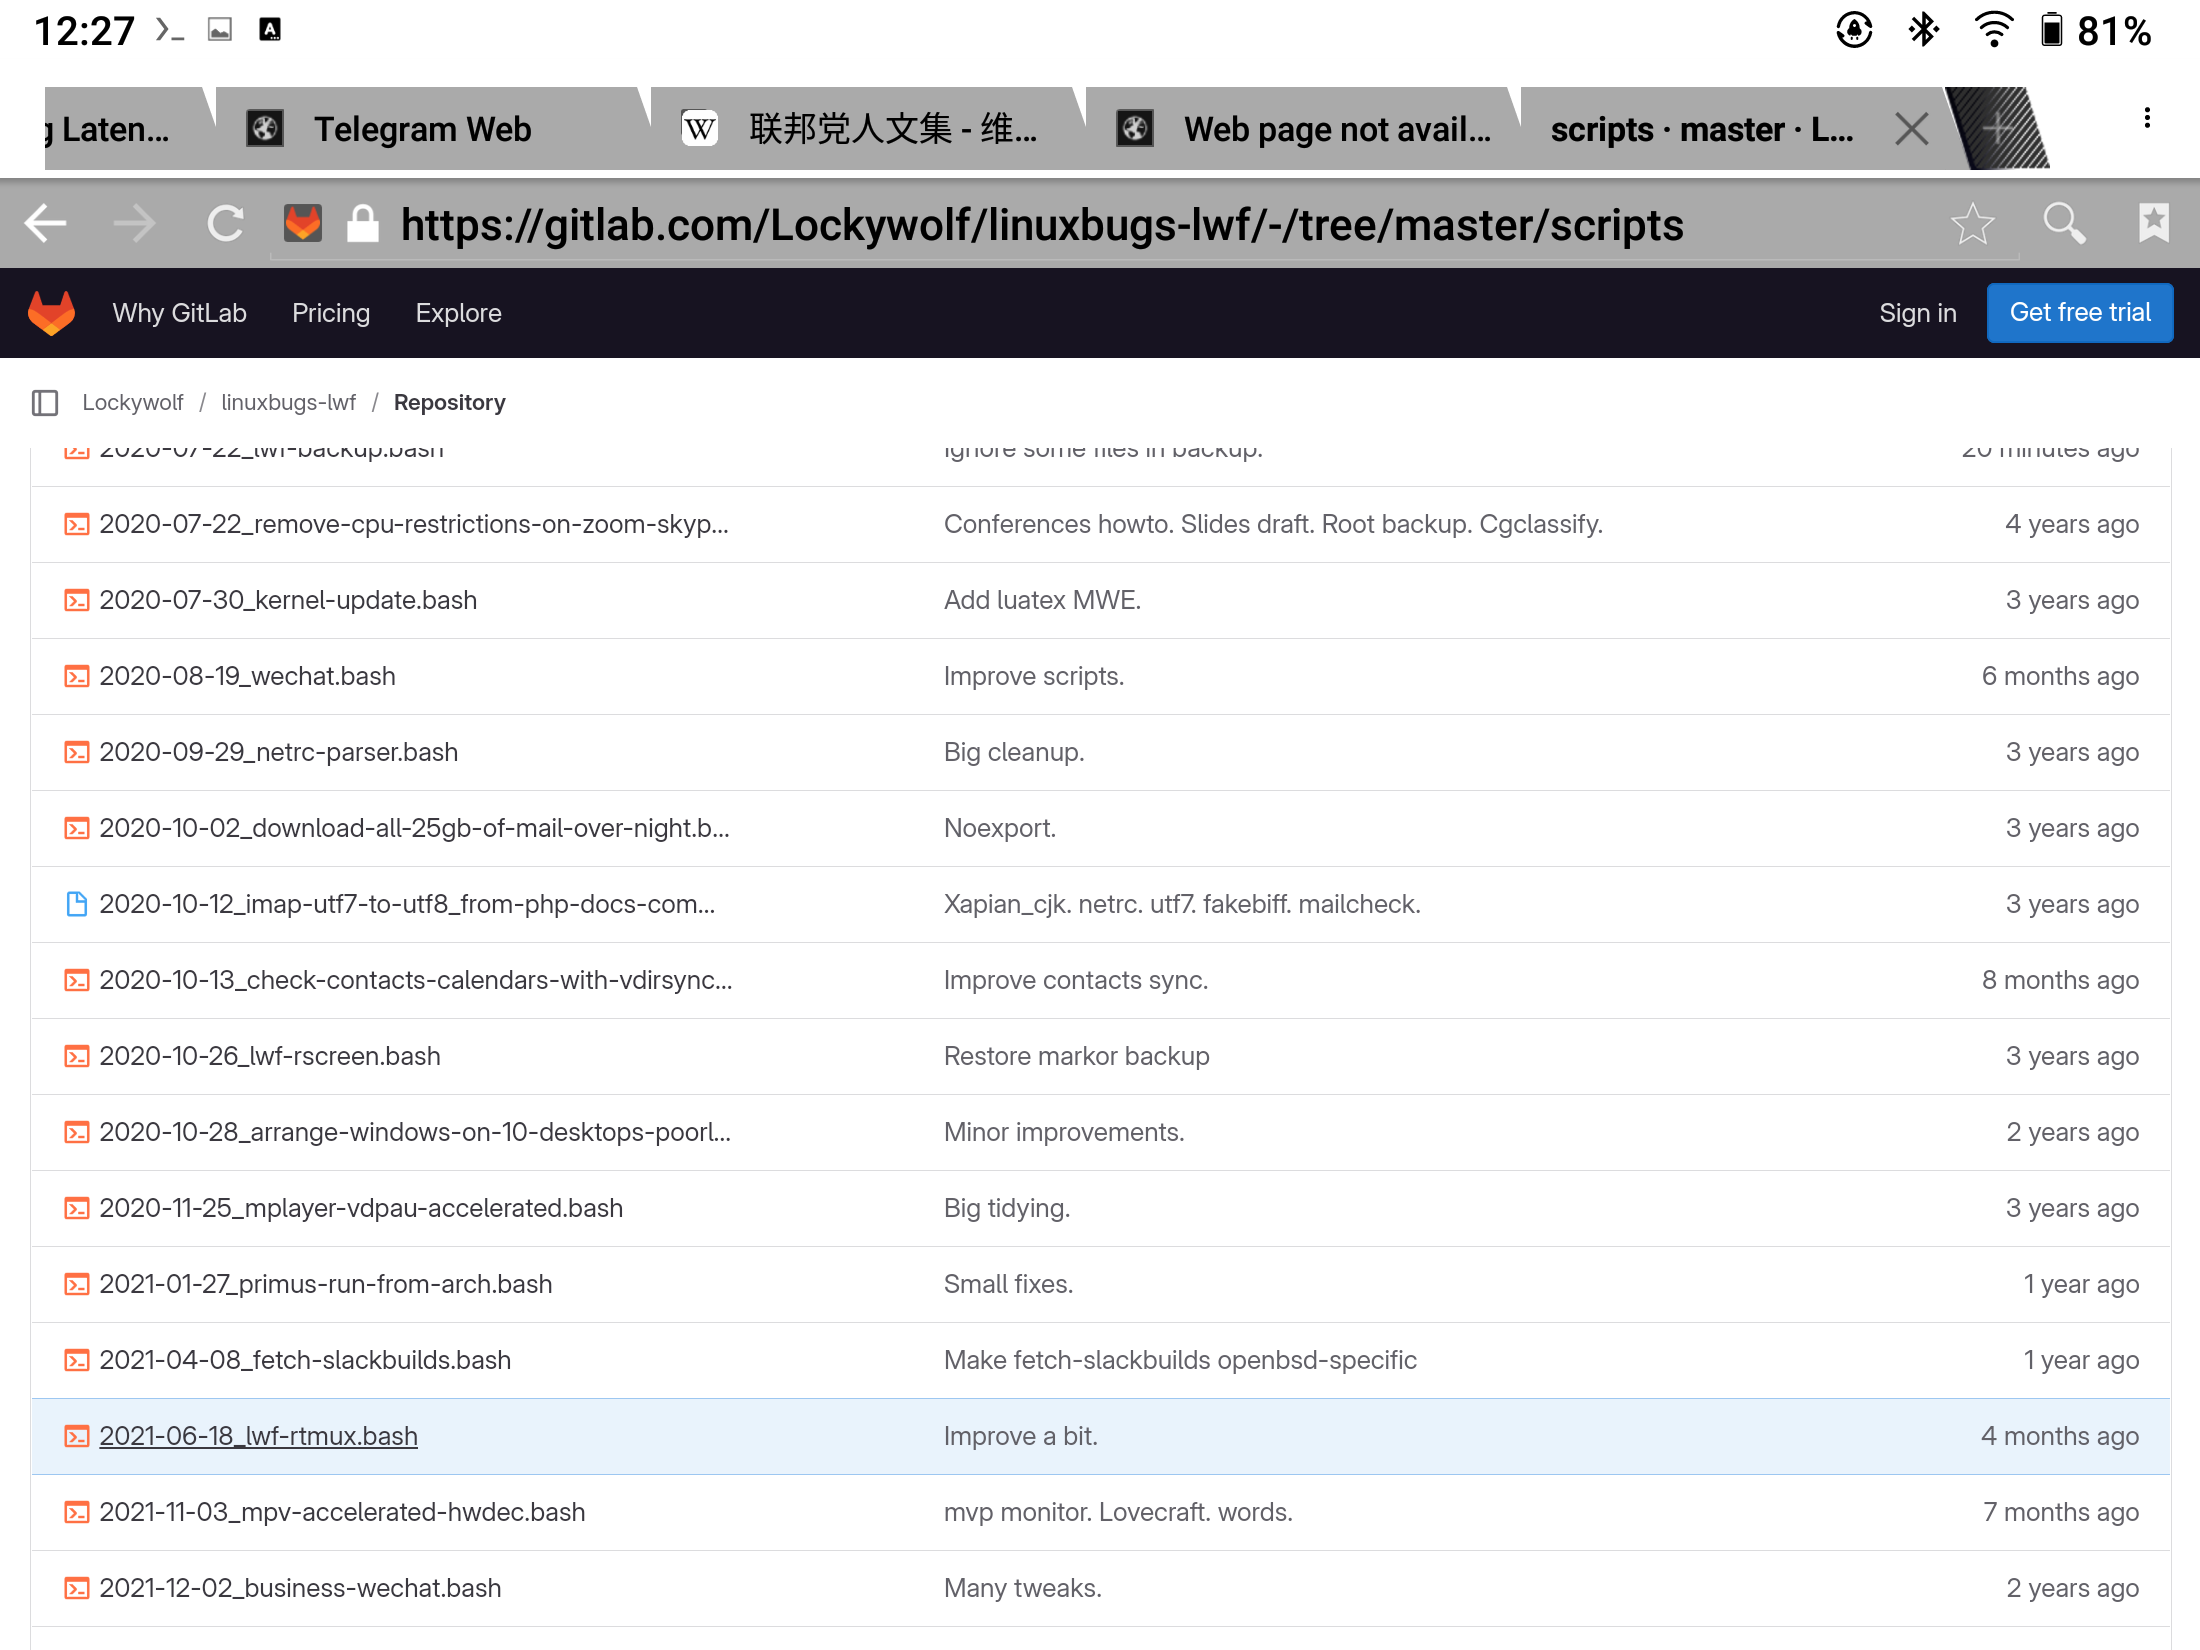
7. Fennec from F-Droid and other Web Browsing.
Fenned is an unofficial build of Firefox, and it supports 99% of modern websites, even though on an eBook it runs painfully slow, so it is advised to avoid using it. But sometimes you “just need” to visit a modern website, and then Fennec is your only option.
Otherwise, browser options are the following:
- Built-in browser, based on Chromium 88. Moderate speed, mostly compatible, but does not support extensions and has weird hotkeys.
- Fennec. Slow, 99% compatible, also has weird hotkeys, extensible.
- Emacs+EWW. Fast, customizable, has nice hotkeys, but supports only about 60% websits.
- Emacs+W3M (termux). Moderate speed. Did not use it a lot.
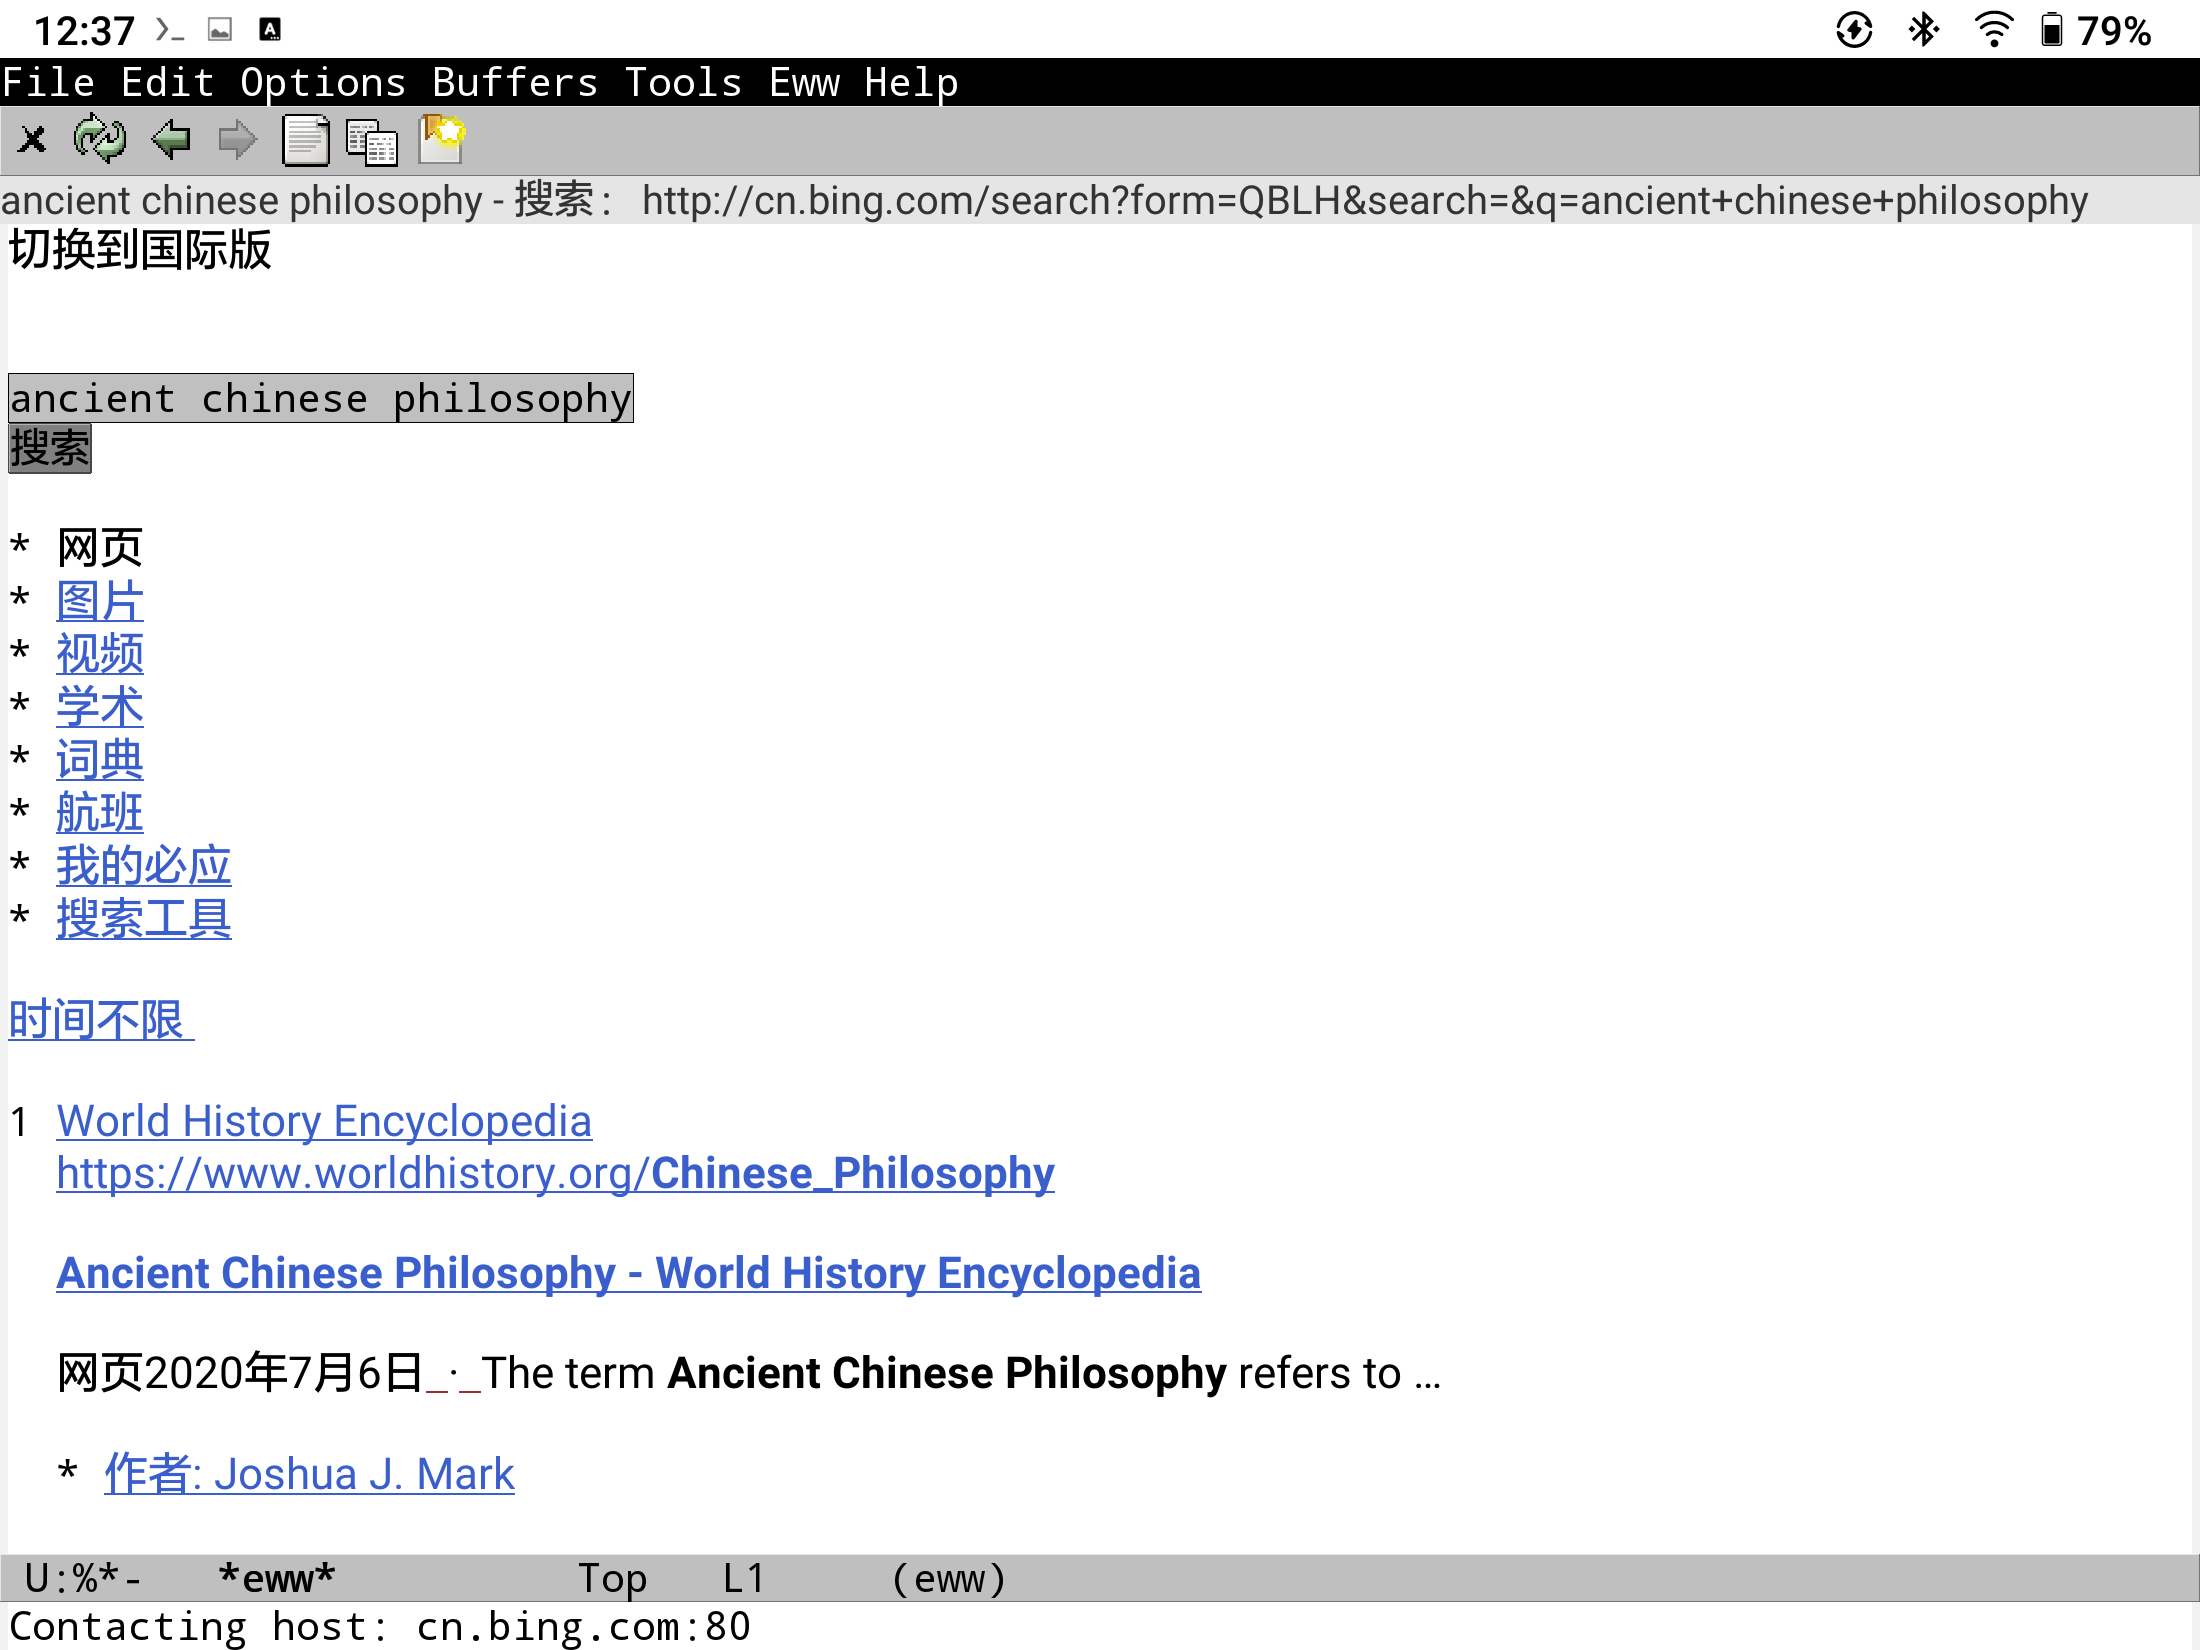
The main problem with EWW and W3M is not that they are ugly, but that they are largely blocked-out by Yandex and Google Javascript-only captcha.
Some screenshots:
Default browser showing Gitlab:
Fennec:
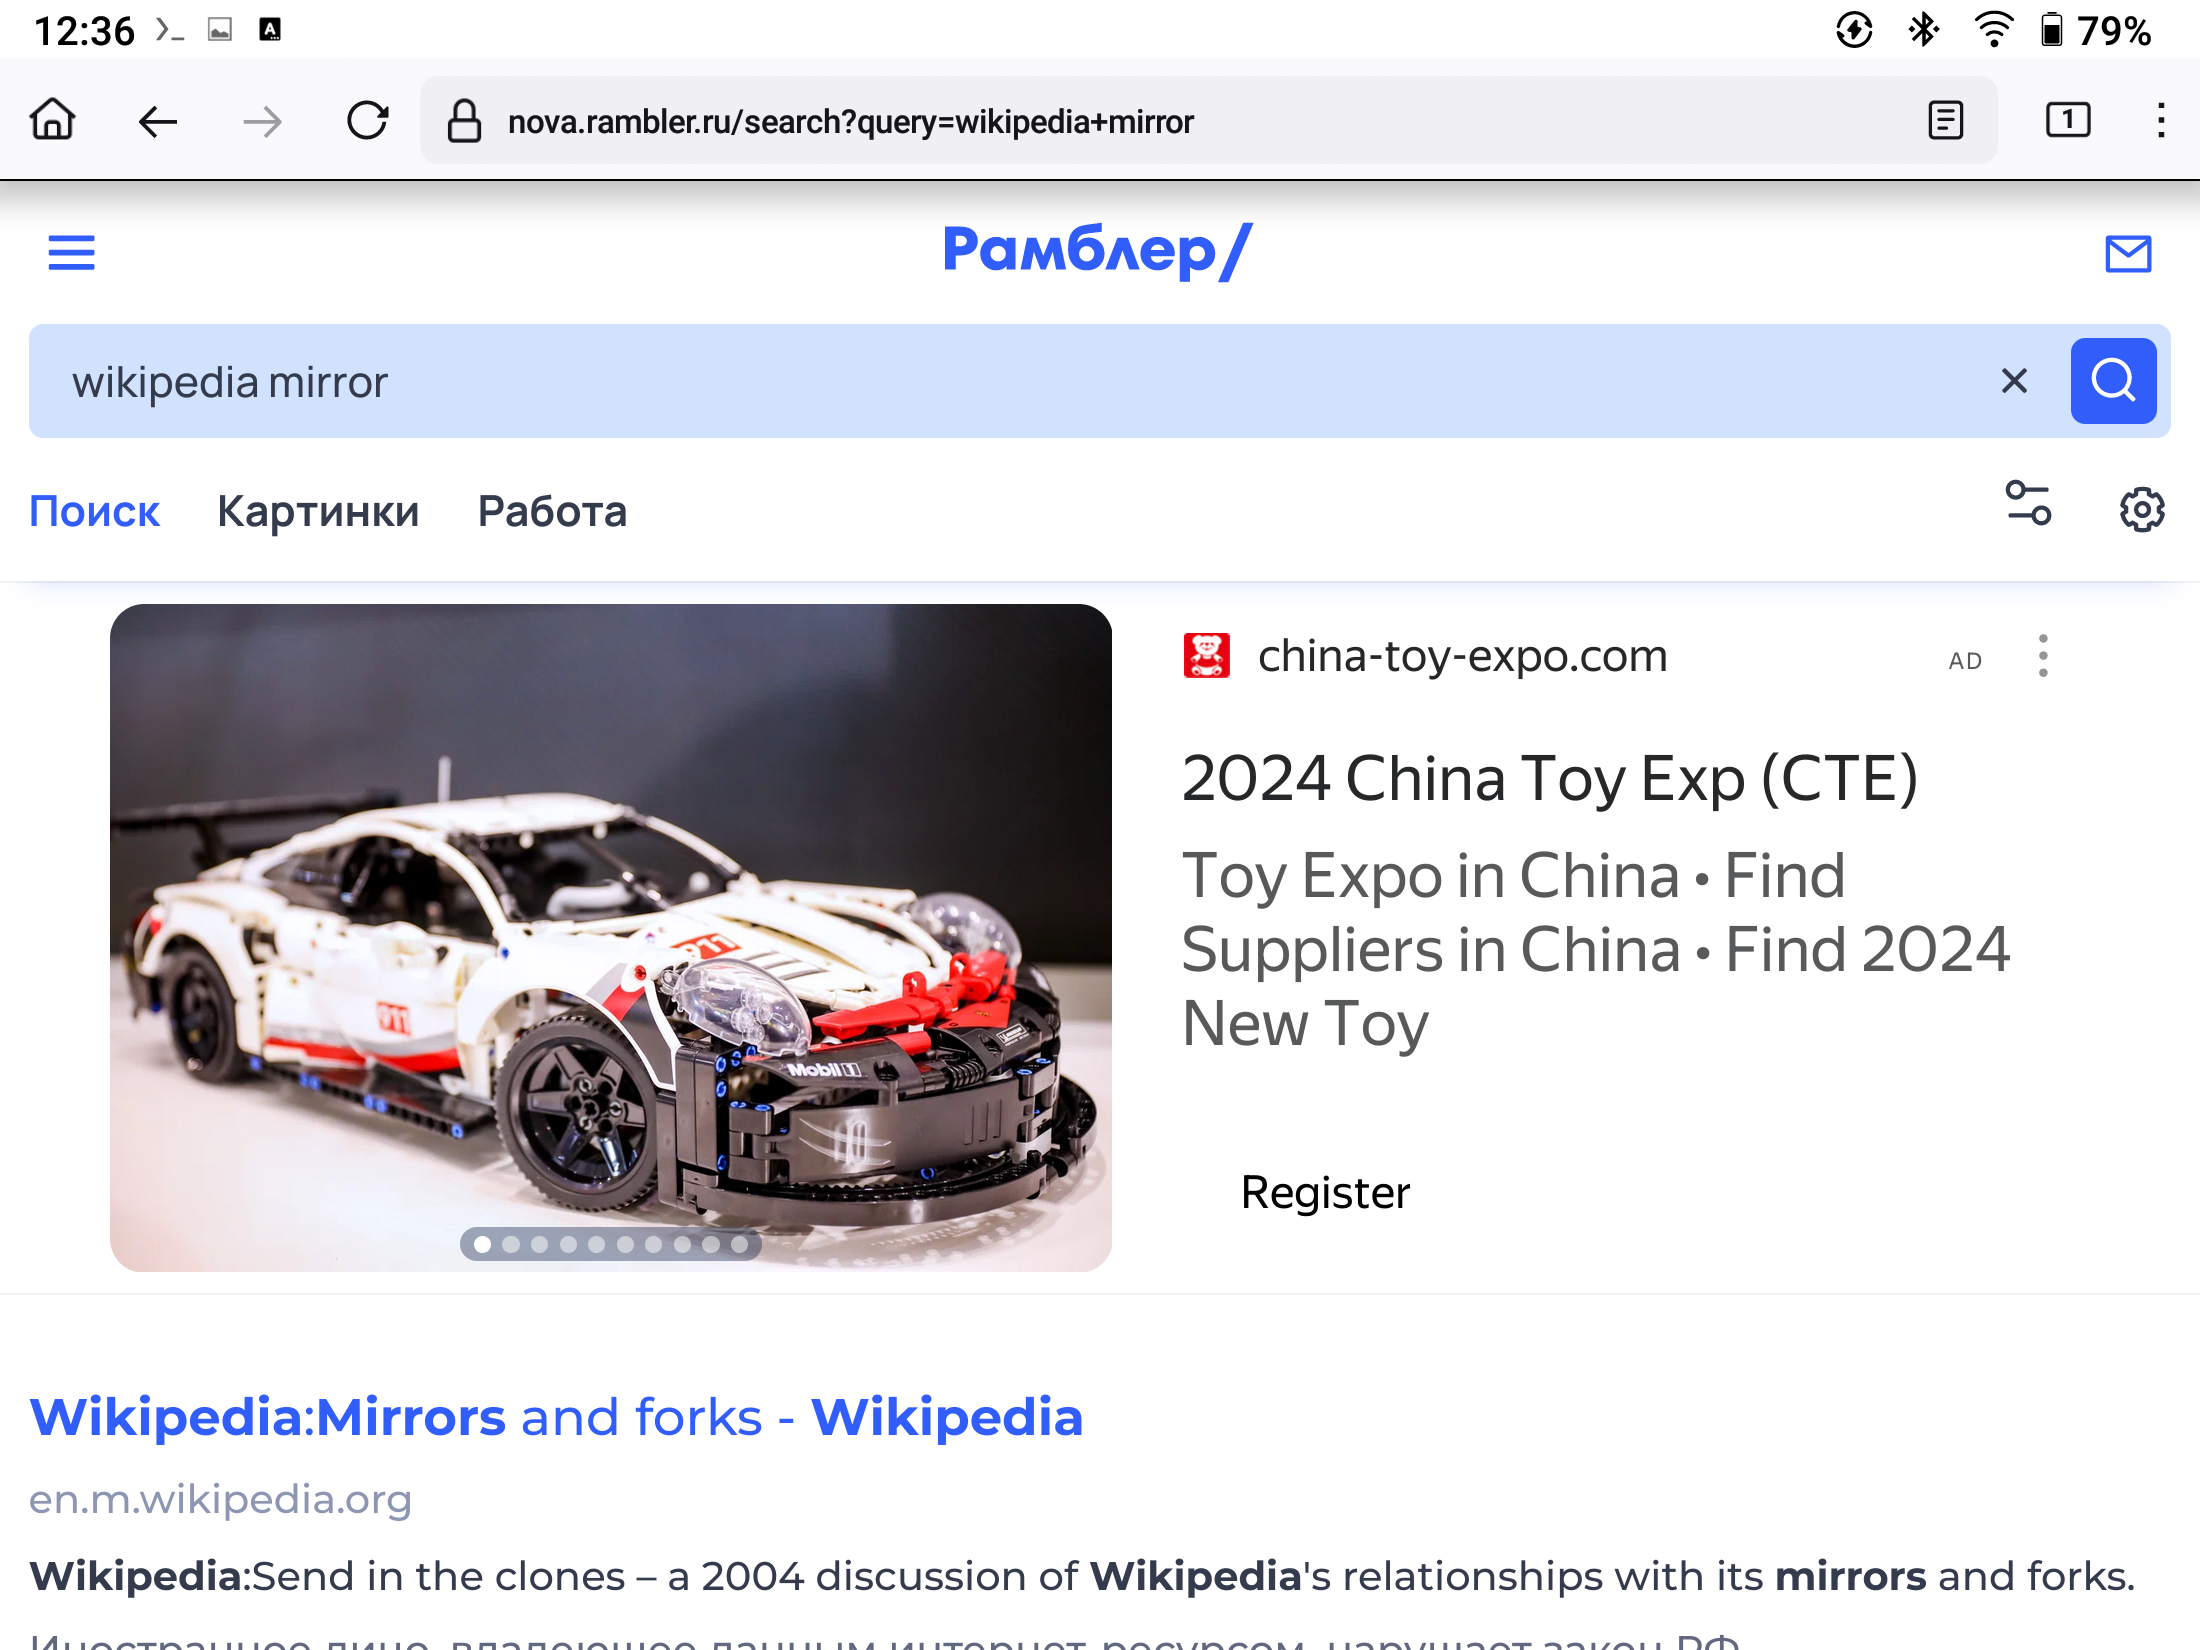
EWW showing Bing:
8. Learn how to use the built-in book reader and notes program.
Reading material, making notes, and talking to other people constitutes 80% of an intellectual office worker job.
While it is generally possible to do a lot of that with generic Android tools, in this subsection I want to mention some eBook specifics.
8.1. Shop
The “Shop” is a “book shop”, not app shop. It does not download for free even “free” books, requires a signup, so I could not check where it downloads them.
8.2. Library
Library acts in a “scan mode” or a “directory mode”. Scan is a total obscurity, whereas directory is only semi-obscure. It only displays “some” directories on the storage, I am not sure which, but for sure it does show things under Download, which I recommend everyone to use.
Library collects reading statistics, which is fun, but hard to extract from the app, so the data are pretty useless.
You can setup different “Cloud” services to sync your books. I prefer just using Syncthing, but you can opt-in Onyx Cloud (costless 10G), or setup NextCloud or WebDAV, which might be convenient for you.
8.3. Neoreader
Neoreader is the default app for reading books on Boox Max 2.
Even though it is probably better to avoid it, I don’t think it is realistic.
You can try reading with KOReader (optimised for eInk), and “Book Reader” (com.github.axet.reader), but so far the only way to open two programs side-by side on Max 2 I have found is Neoreader+Notes.
Of course, you can also run two Emacs programs side-by-side, and if you fancy reading epubs using Wasamasa’s nov.el, you can do your reading conveniently.
I managed to display pdfs in Emacs, both in doc-view-mode, and in pdf-view-mode, but I still do not recommend reading PDFs in it because annotations do not work and because Emacs is still not exactly swift when working with the touch-screen.
Let us delve a bit more into the NeoReader features.
NeoReader can view and annotate PDFs, epub, mobi, txt files.
The main interface is opened by tapping the middle of the screen.
8.3.1. Fixing font display
Some characters are missing from the default fonts available on Boox Max 2.
- Open any document
- Tap page center
- At the bottom: Format->Fonts->CJK->LXGW WenKai (You may need to download it)
LXGW WenKai is not beautiful, it looks like Comic Sans, but it can display every character I need.
8.3.2. Installing new fonts.
Okay, you certainly can download new fonts via the Neoreader app. I think there was some other way as well, but I forgot.
There are directories:
- sdcard/fonts
- sdcard/jd_jeb_fonts
Maybe fonts are copied there?
8.3.3. Reading efficiently.
People have different manners of reading documents.
The two most common difficulties are the lack of context on a page, and too much irrelevant content on the page.
- Lack of context can be fixed by using the RTL and LTR modes.
This is what it looks like:
- Too much context can be fixed by re-formatting a page using a process called “reflow”.
Reflow in Neoreader is fairly straightforward, but the interesting thing is that it should not be confused with “Navigation”.
“Reflow” algorithmically transforms the page, “Navigation” just jumps over the original page. However, for some obscure reason, “Reflow” is under the navigation tab at the bottom of the screen.
The confusing “More” button on the same tab does “Navigation”, not “reflow”.
There is also “text-based reflow”, which can totaly transform the page based on text-based PDFs, but I am not sure how well formulas are preserved.
8.3.4. Annotation and reading side-by-side.
As already mentioned, Emacs’ nov.el can read epub files, which is mostly what you need. Then you can annotate them in any way you want.
So this section is only of interest to those reading PDFs.
- Floating bar
Floating bar has extremely confusing item names. However, from what I can tell, it is not really needed for anything exclusively. You can tweak it if you find yourself missing “quick access” to certain features, but, as far as I can tell, most features can be accessed from the “tap the middle of the page” interface.
Do not, however, confuse the “Floating bar” with the “Handwriting floating bar”.
The second one is triggered by tapping “Notes” in the MiddleTap->Top-right-corner, or (to increase confusion), the pencil icon in the “normal” “floating bar”.
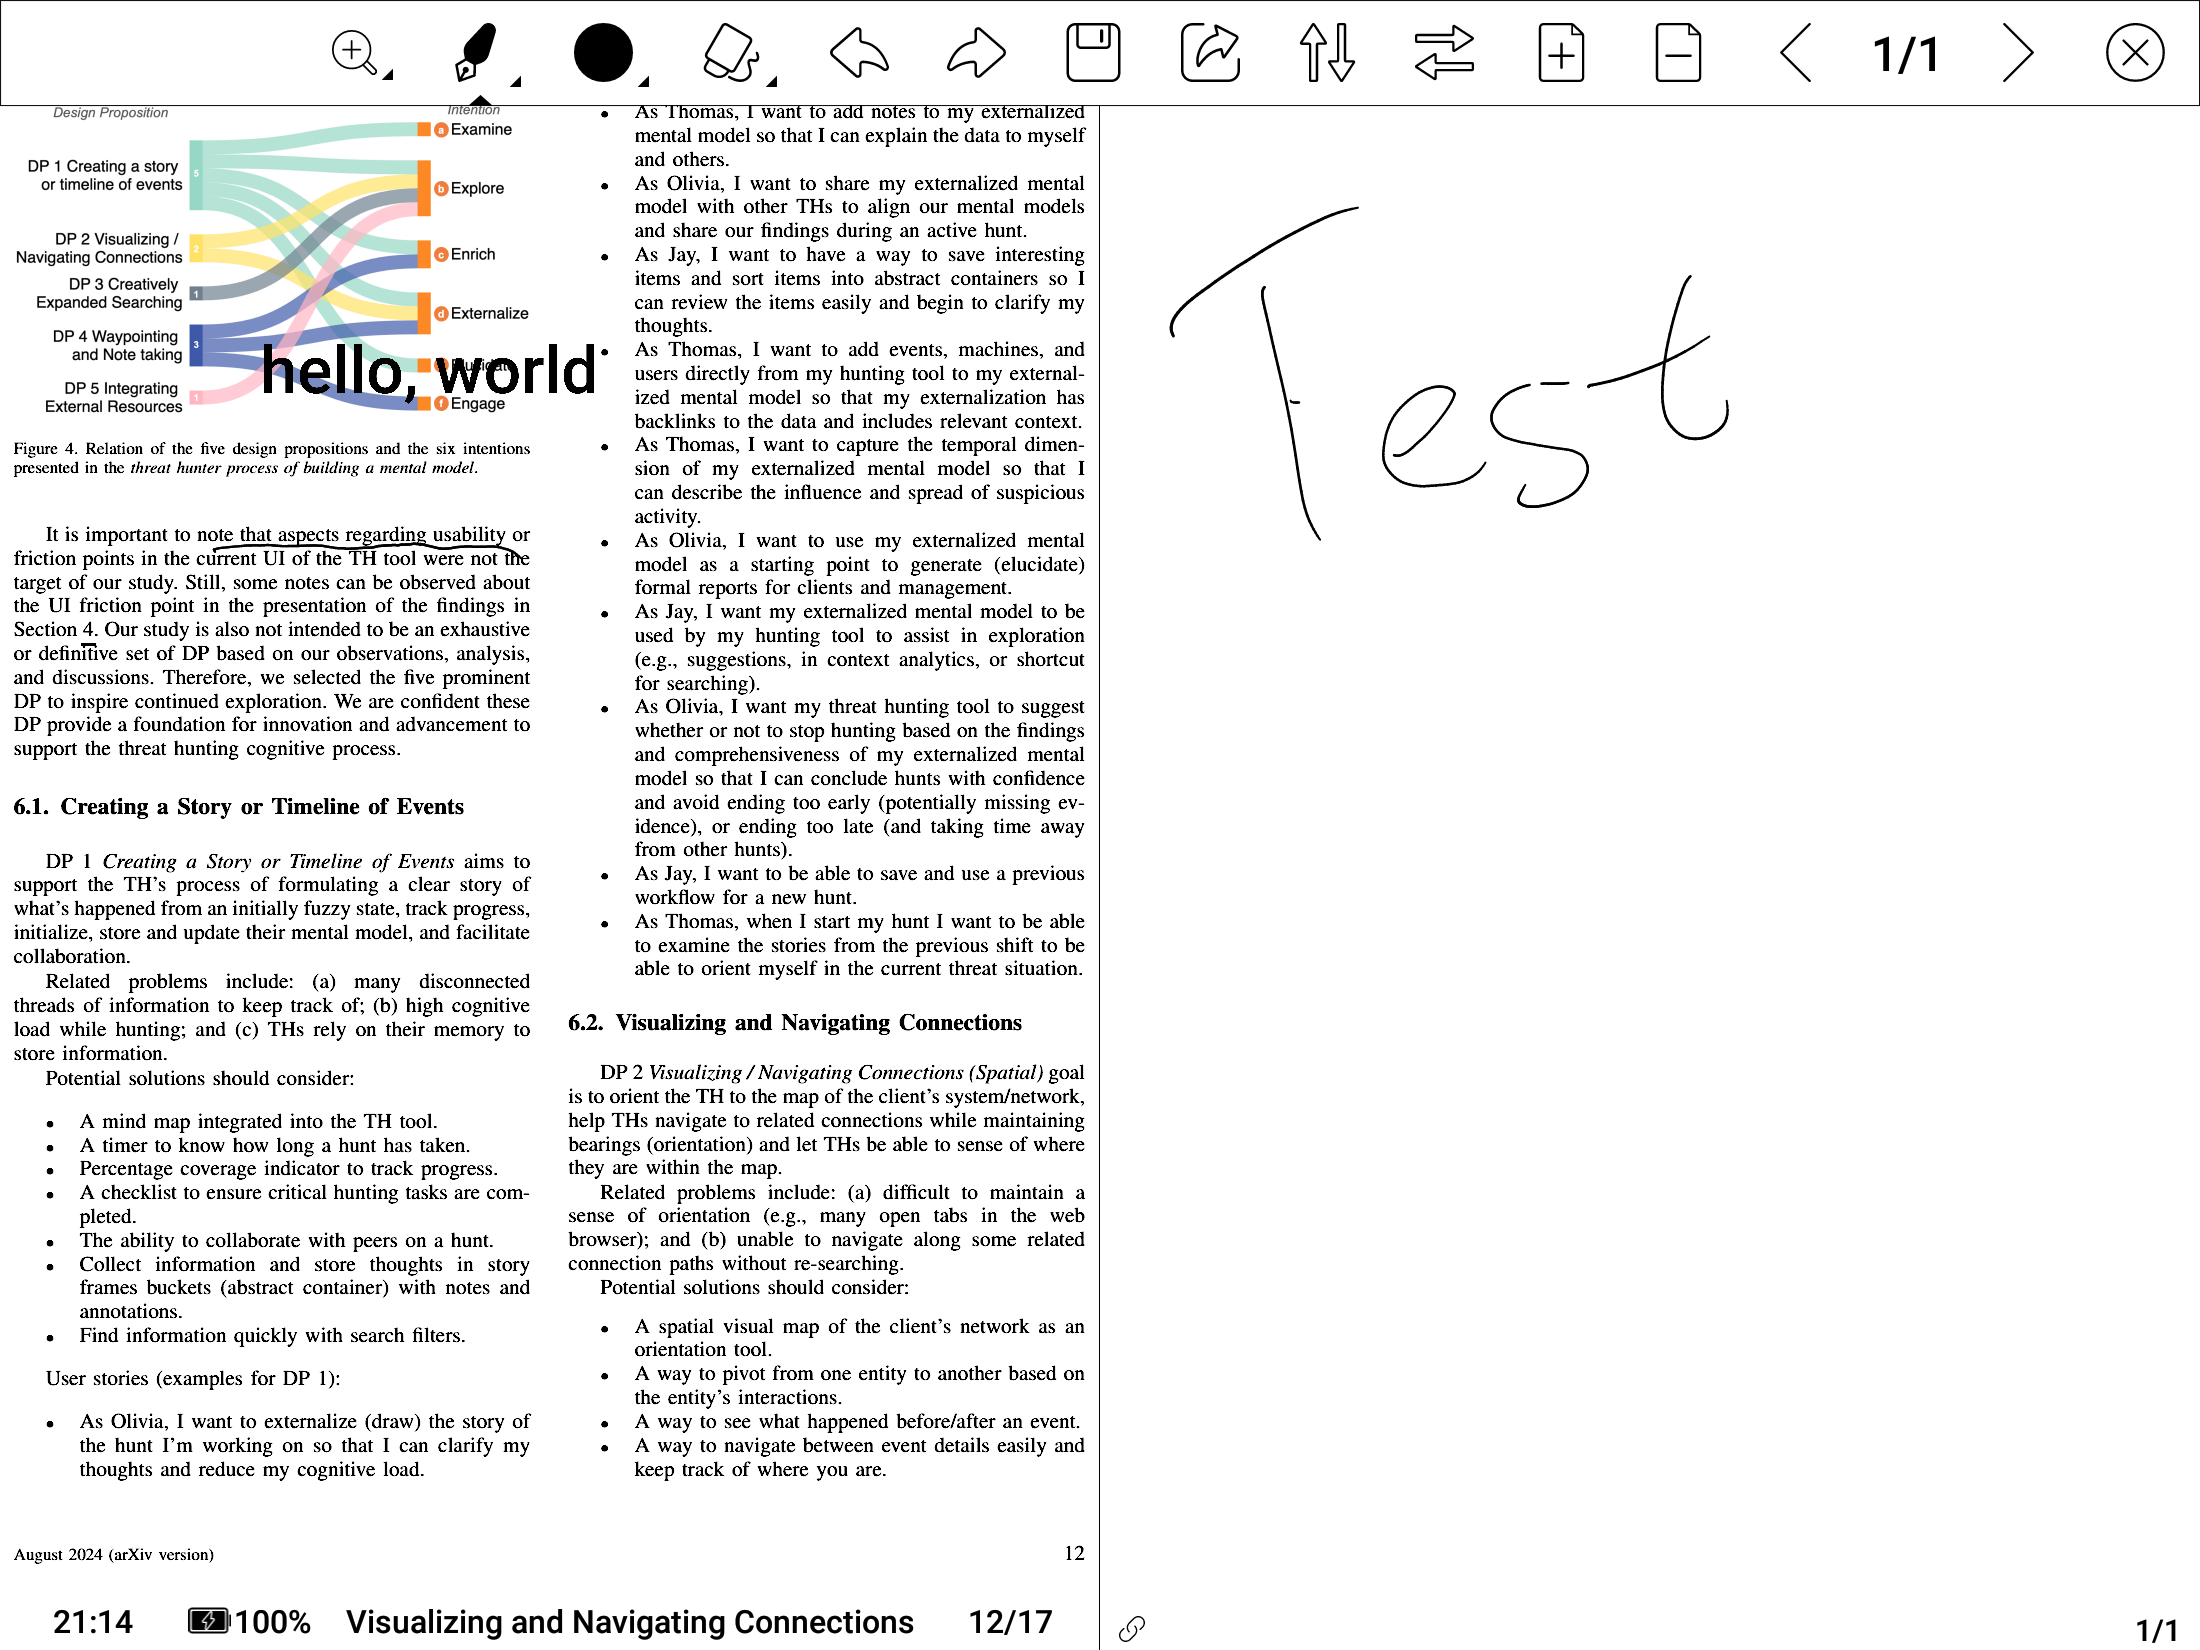
- Writing on-top, and side-notes.
Okay, so, the “pen” icon on the “floating toolbar” activates the “handwritten annotation” for a pdf.
“Handwritten annotations” should not be confused with “Handwritten notes”, which is an absolutely unrelated beast.
Handwritten annotations are saved in some internal metadata for the Neoreader, and cannot be exported on their own, they are exported “within the PDF” or as a png file.
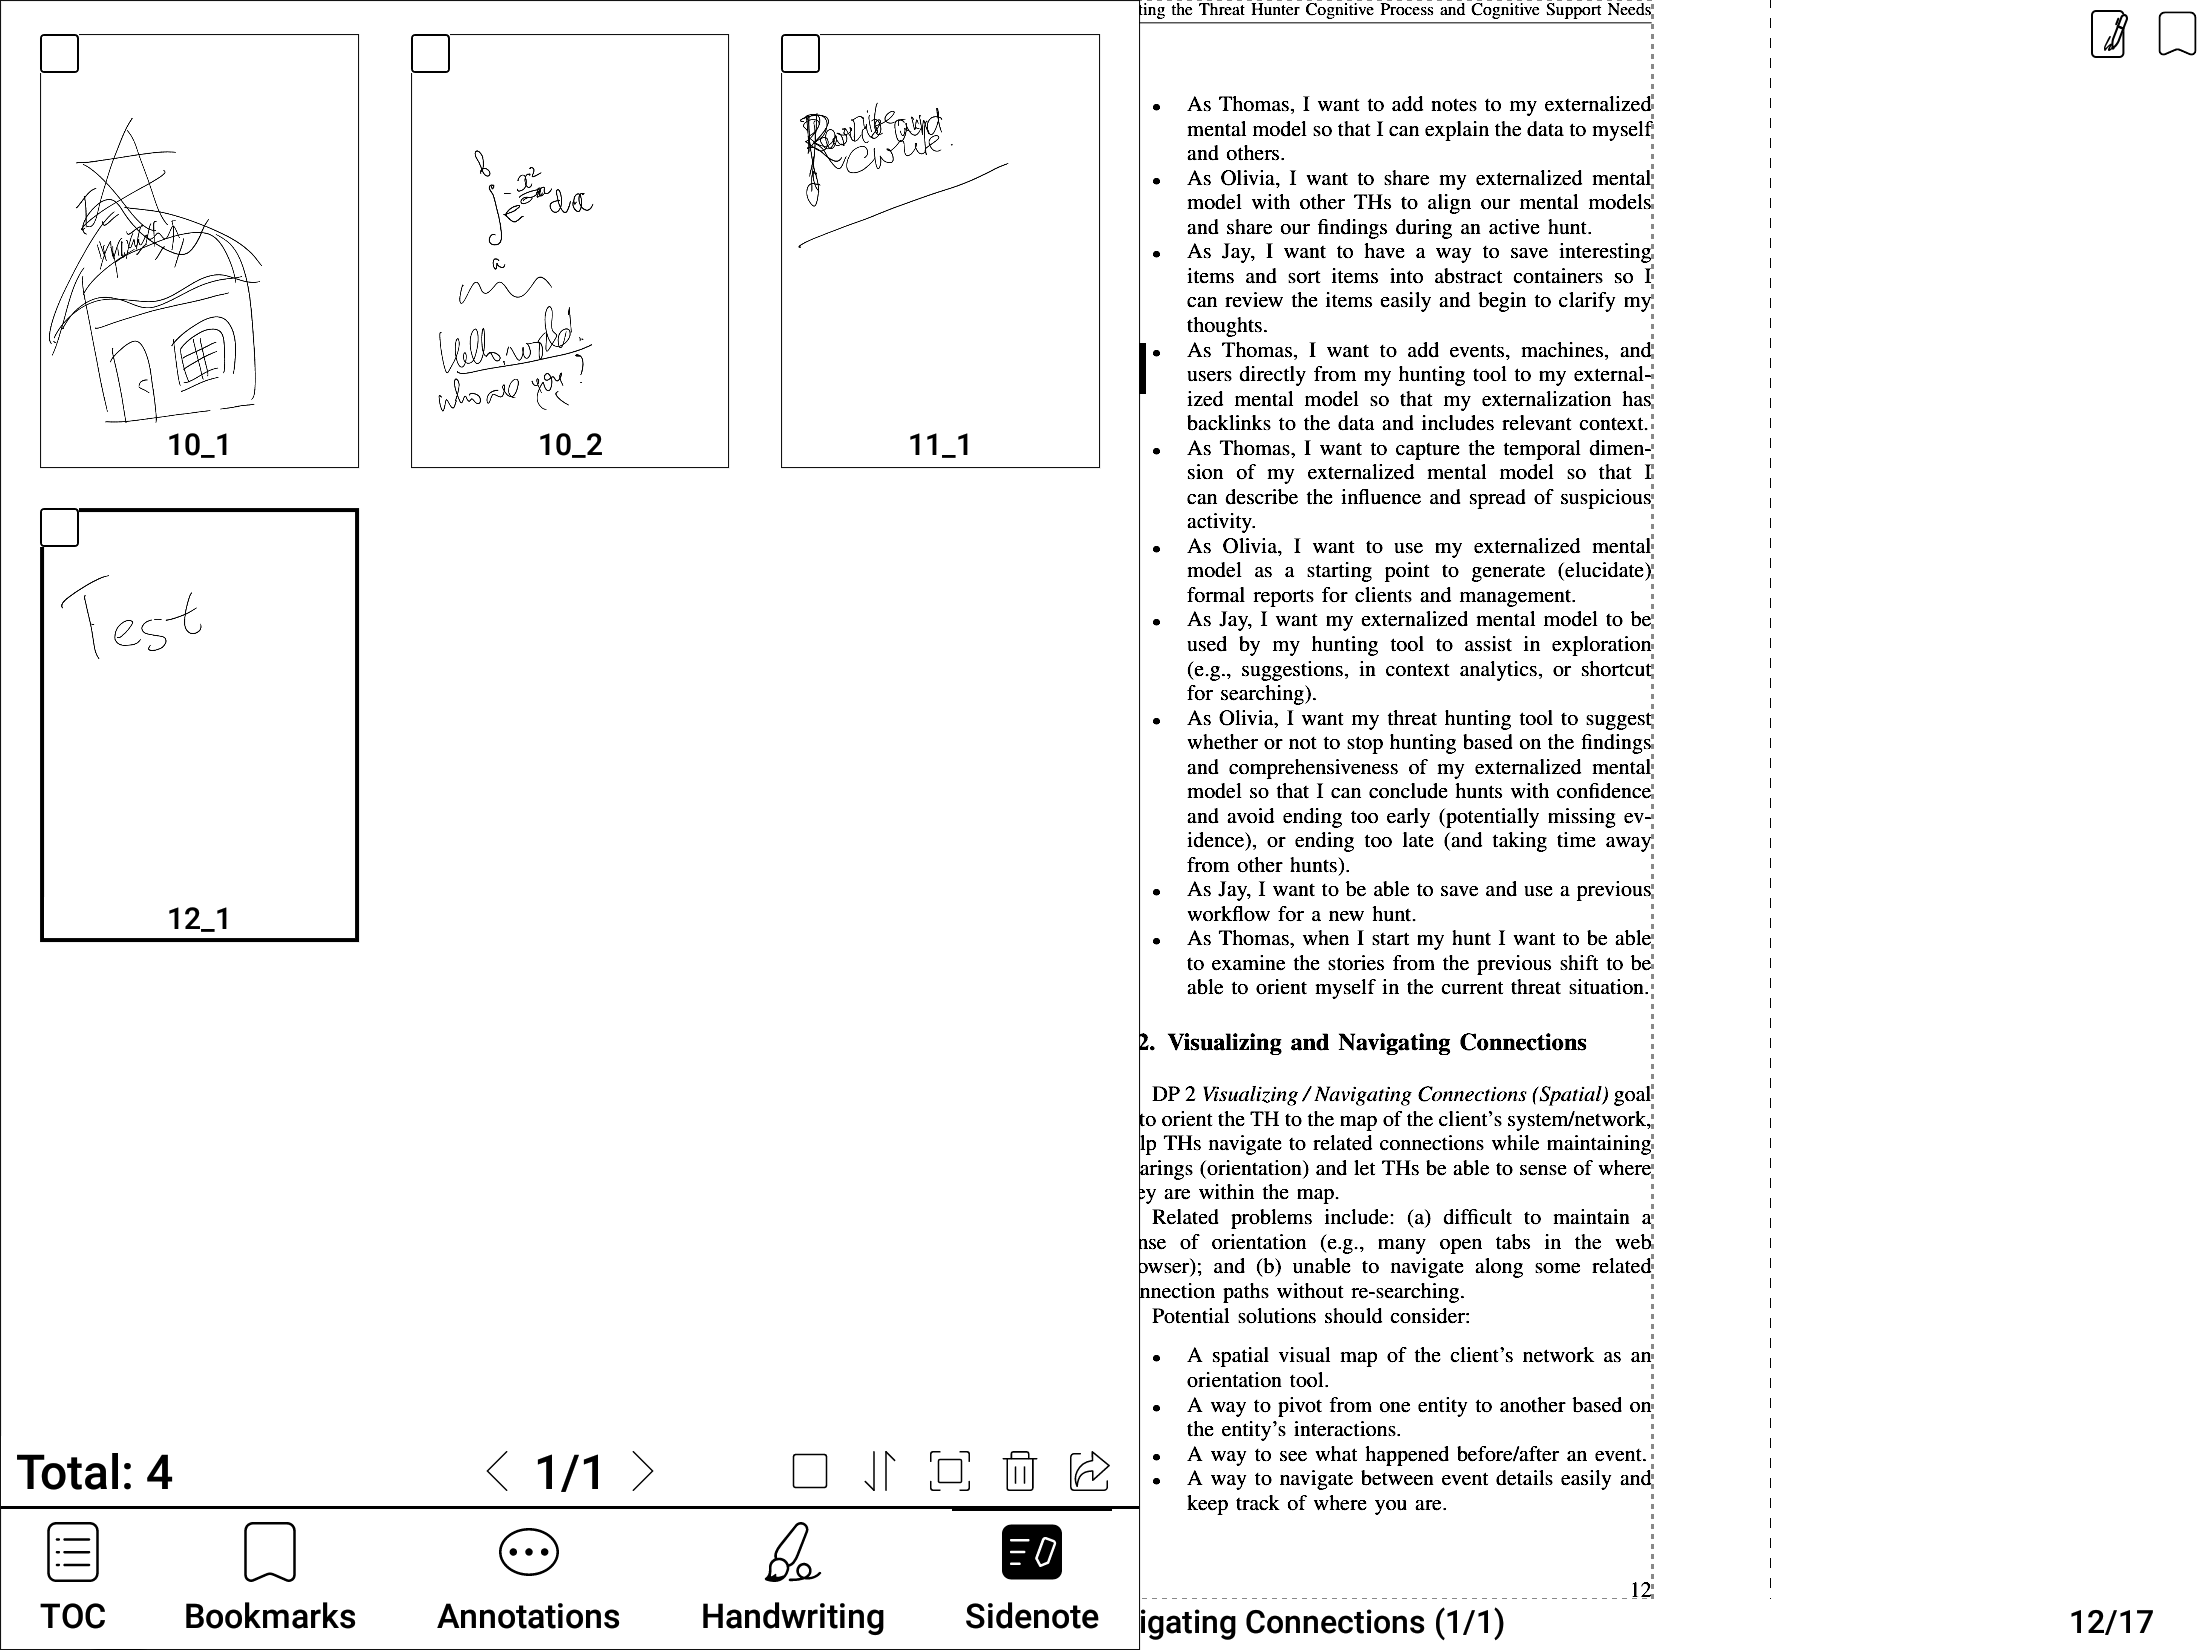
The strange pen icon on the “handwriting toolbar” triggers the “side note”.
Side notes allow you to write “sketch on the margins” of a document. Each “side-note” is associated with a page of the document. There are two problems with this thing:
- On export, all inserted pages are exported between the first and the second pages of the old document, which is stupid.
- You cannot add text notes in the “inserted pages”.
What is this method of annotation good for?
In theory, it can be good for reading mathematical papers. You can underline some formulations, circle them, add text notes with clarifying questions, and even do your own derivations on the “side-notes”, and, perhaps, plot some graphs “by hand”.
Unfortunately, exporting is broken, and a pen is not even remotely precise enough for drawing anything meaningful.
You can export them page-by-page, and insert into your Emacs, I guess?
I suspect that nobody actually uses this feature, an this is why it keeps being broken 7 years after the device’s release.
There is, however, a quite useful feature: PDF highlights. You can trigger them by long-pressing on a word and dragging to select a sub-phrase.
The exported PDFs seem to go into the same directory where the original file was, in the form of a directory named as the source file without “.pdf” extension. It includes:
- “Handwriting”
- “Side-notes”
- PDF Highlights
“Handwriting”, “Side-notes”, and “PDF Highlights” can be also exported individually, from the “TOC” panel, which makes them slightly more useful. They all go into a directory near the original file location.
“PDF Highlights” are exported into a text file, which, if you annotate extensively, can serve as lecture notes for the book, for your own reference later.
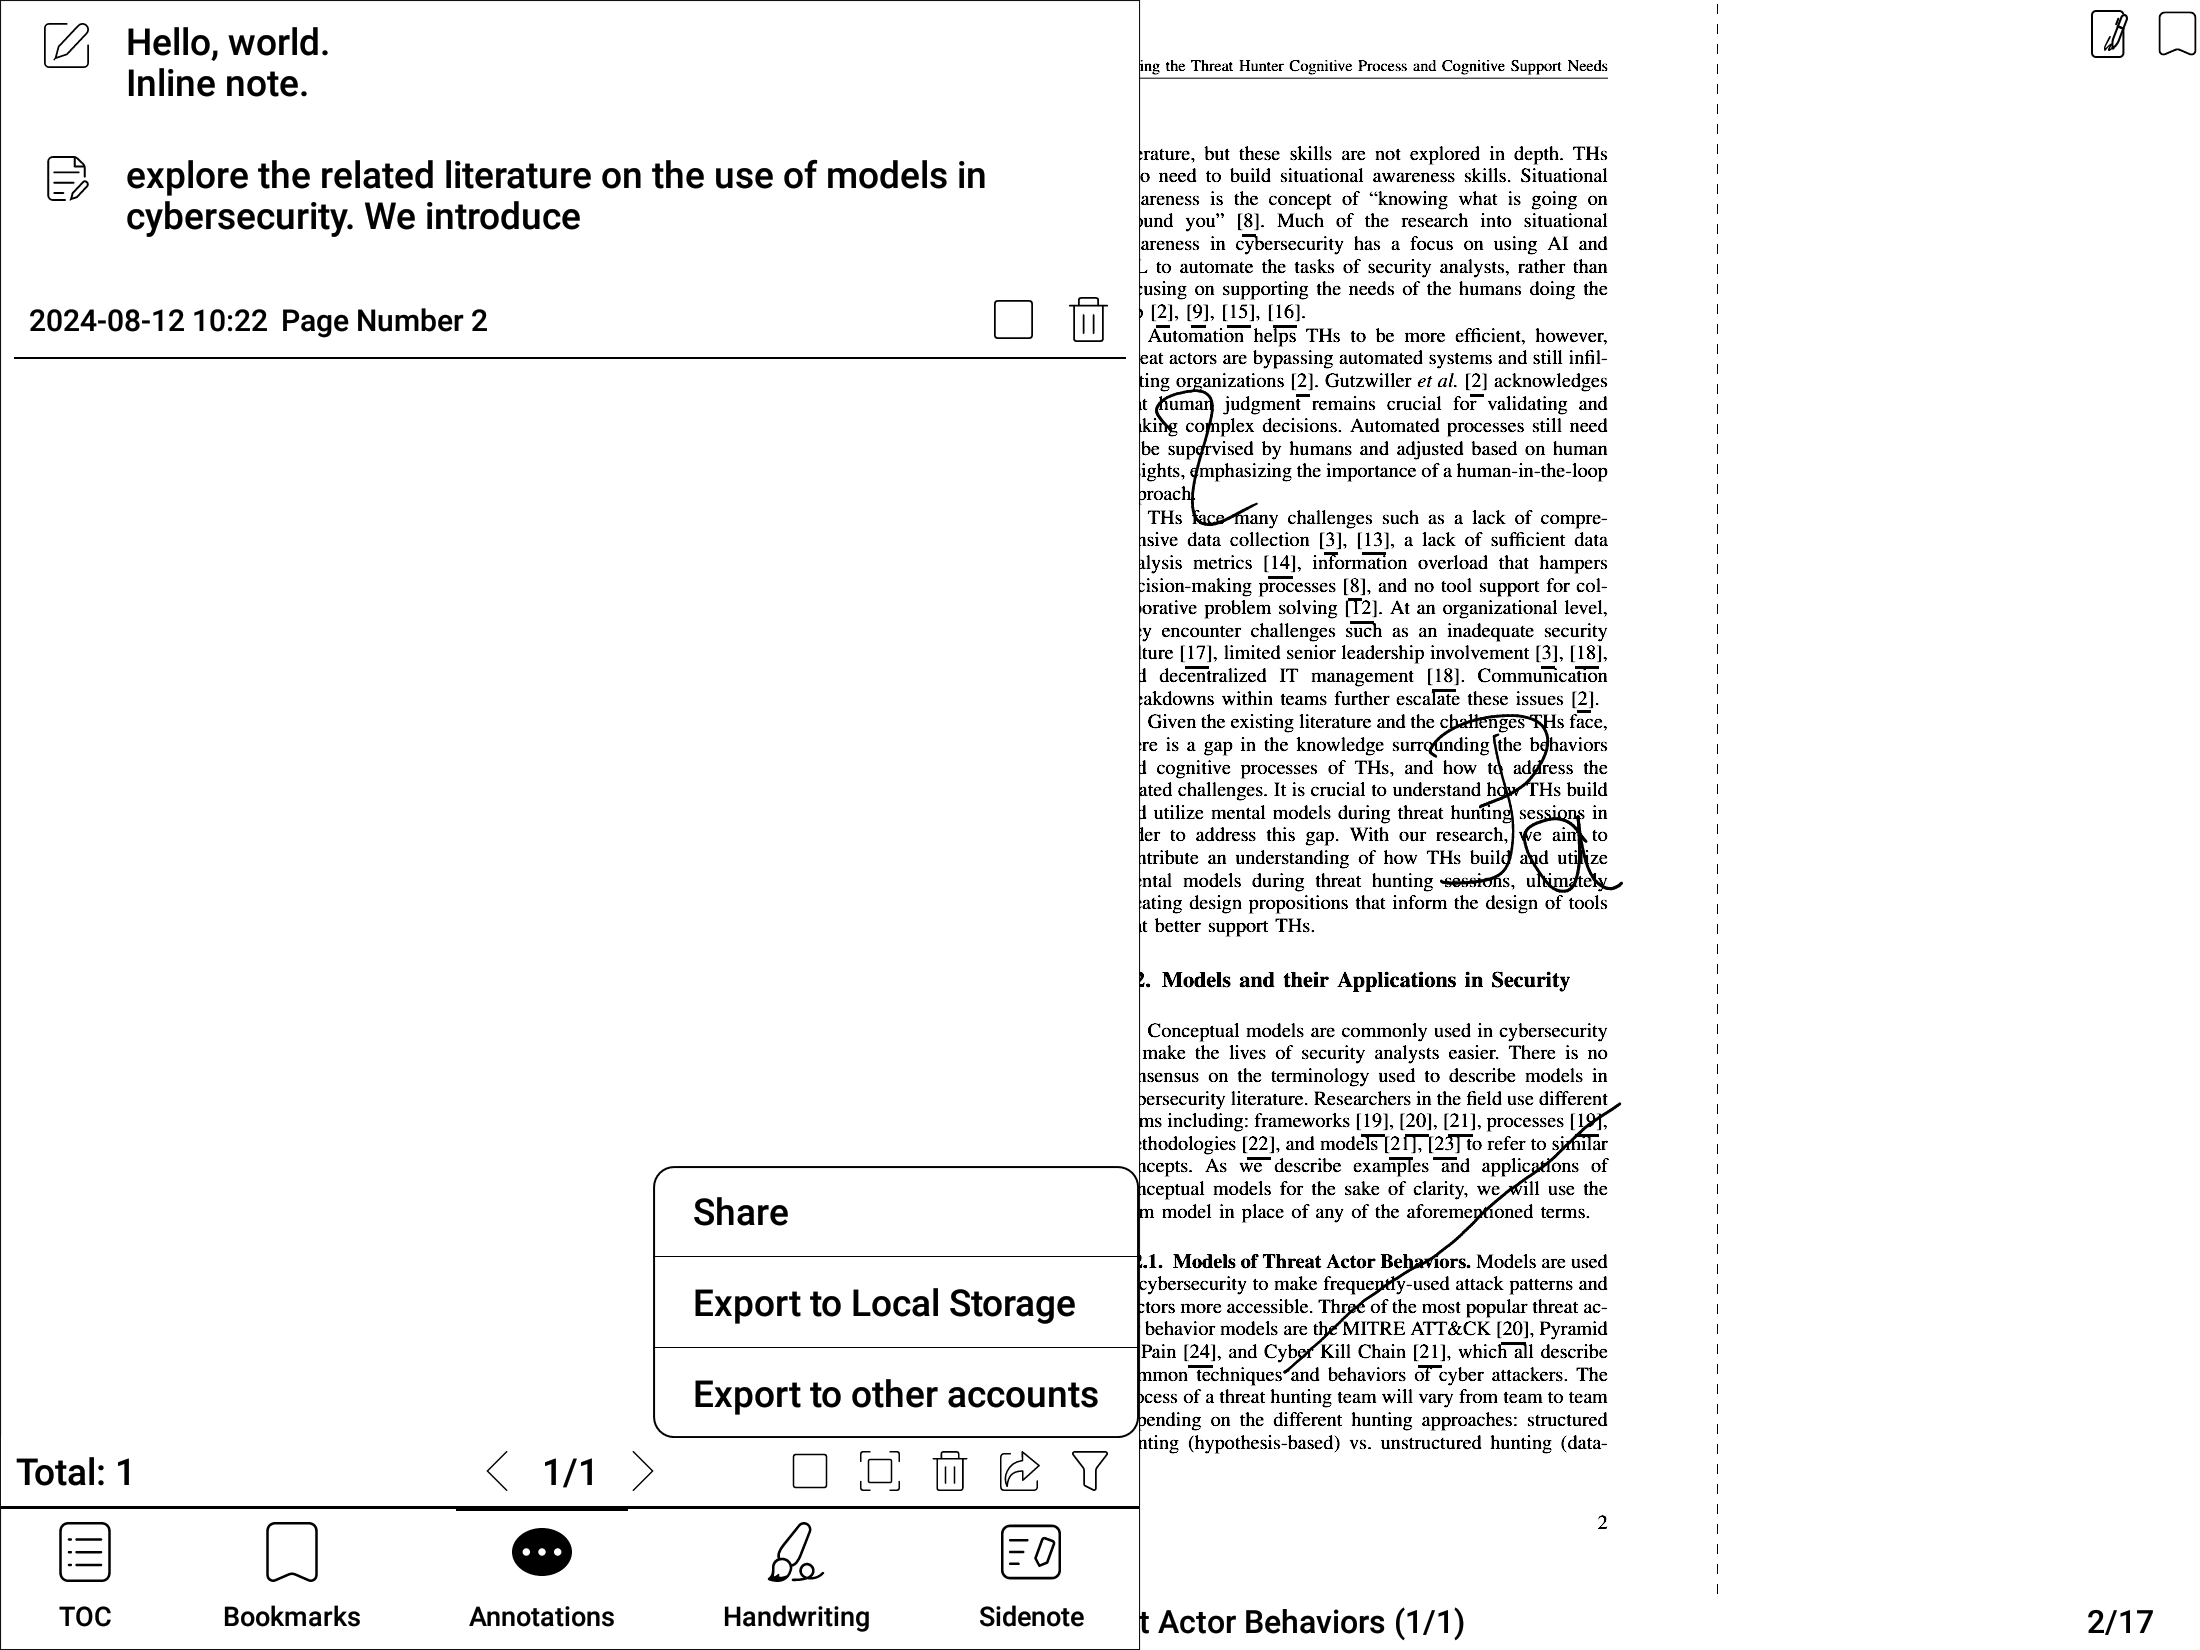
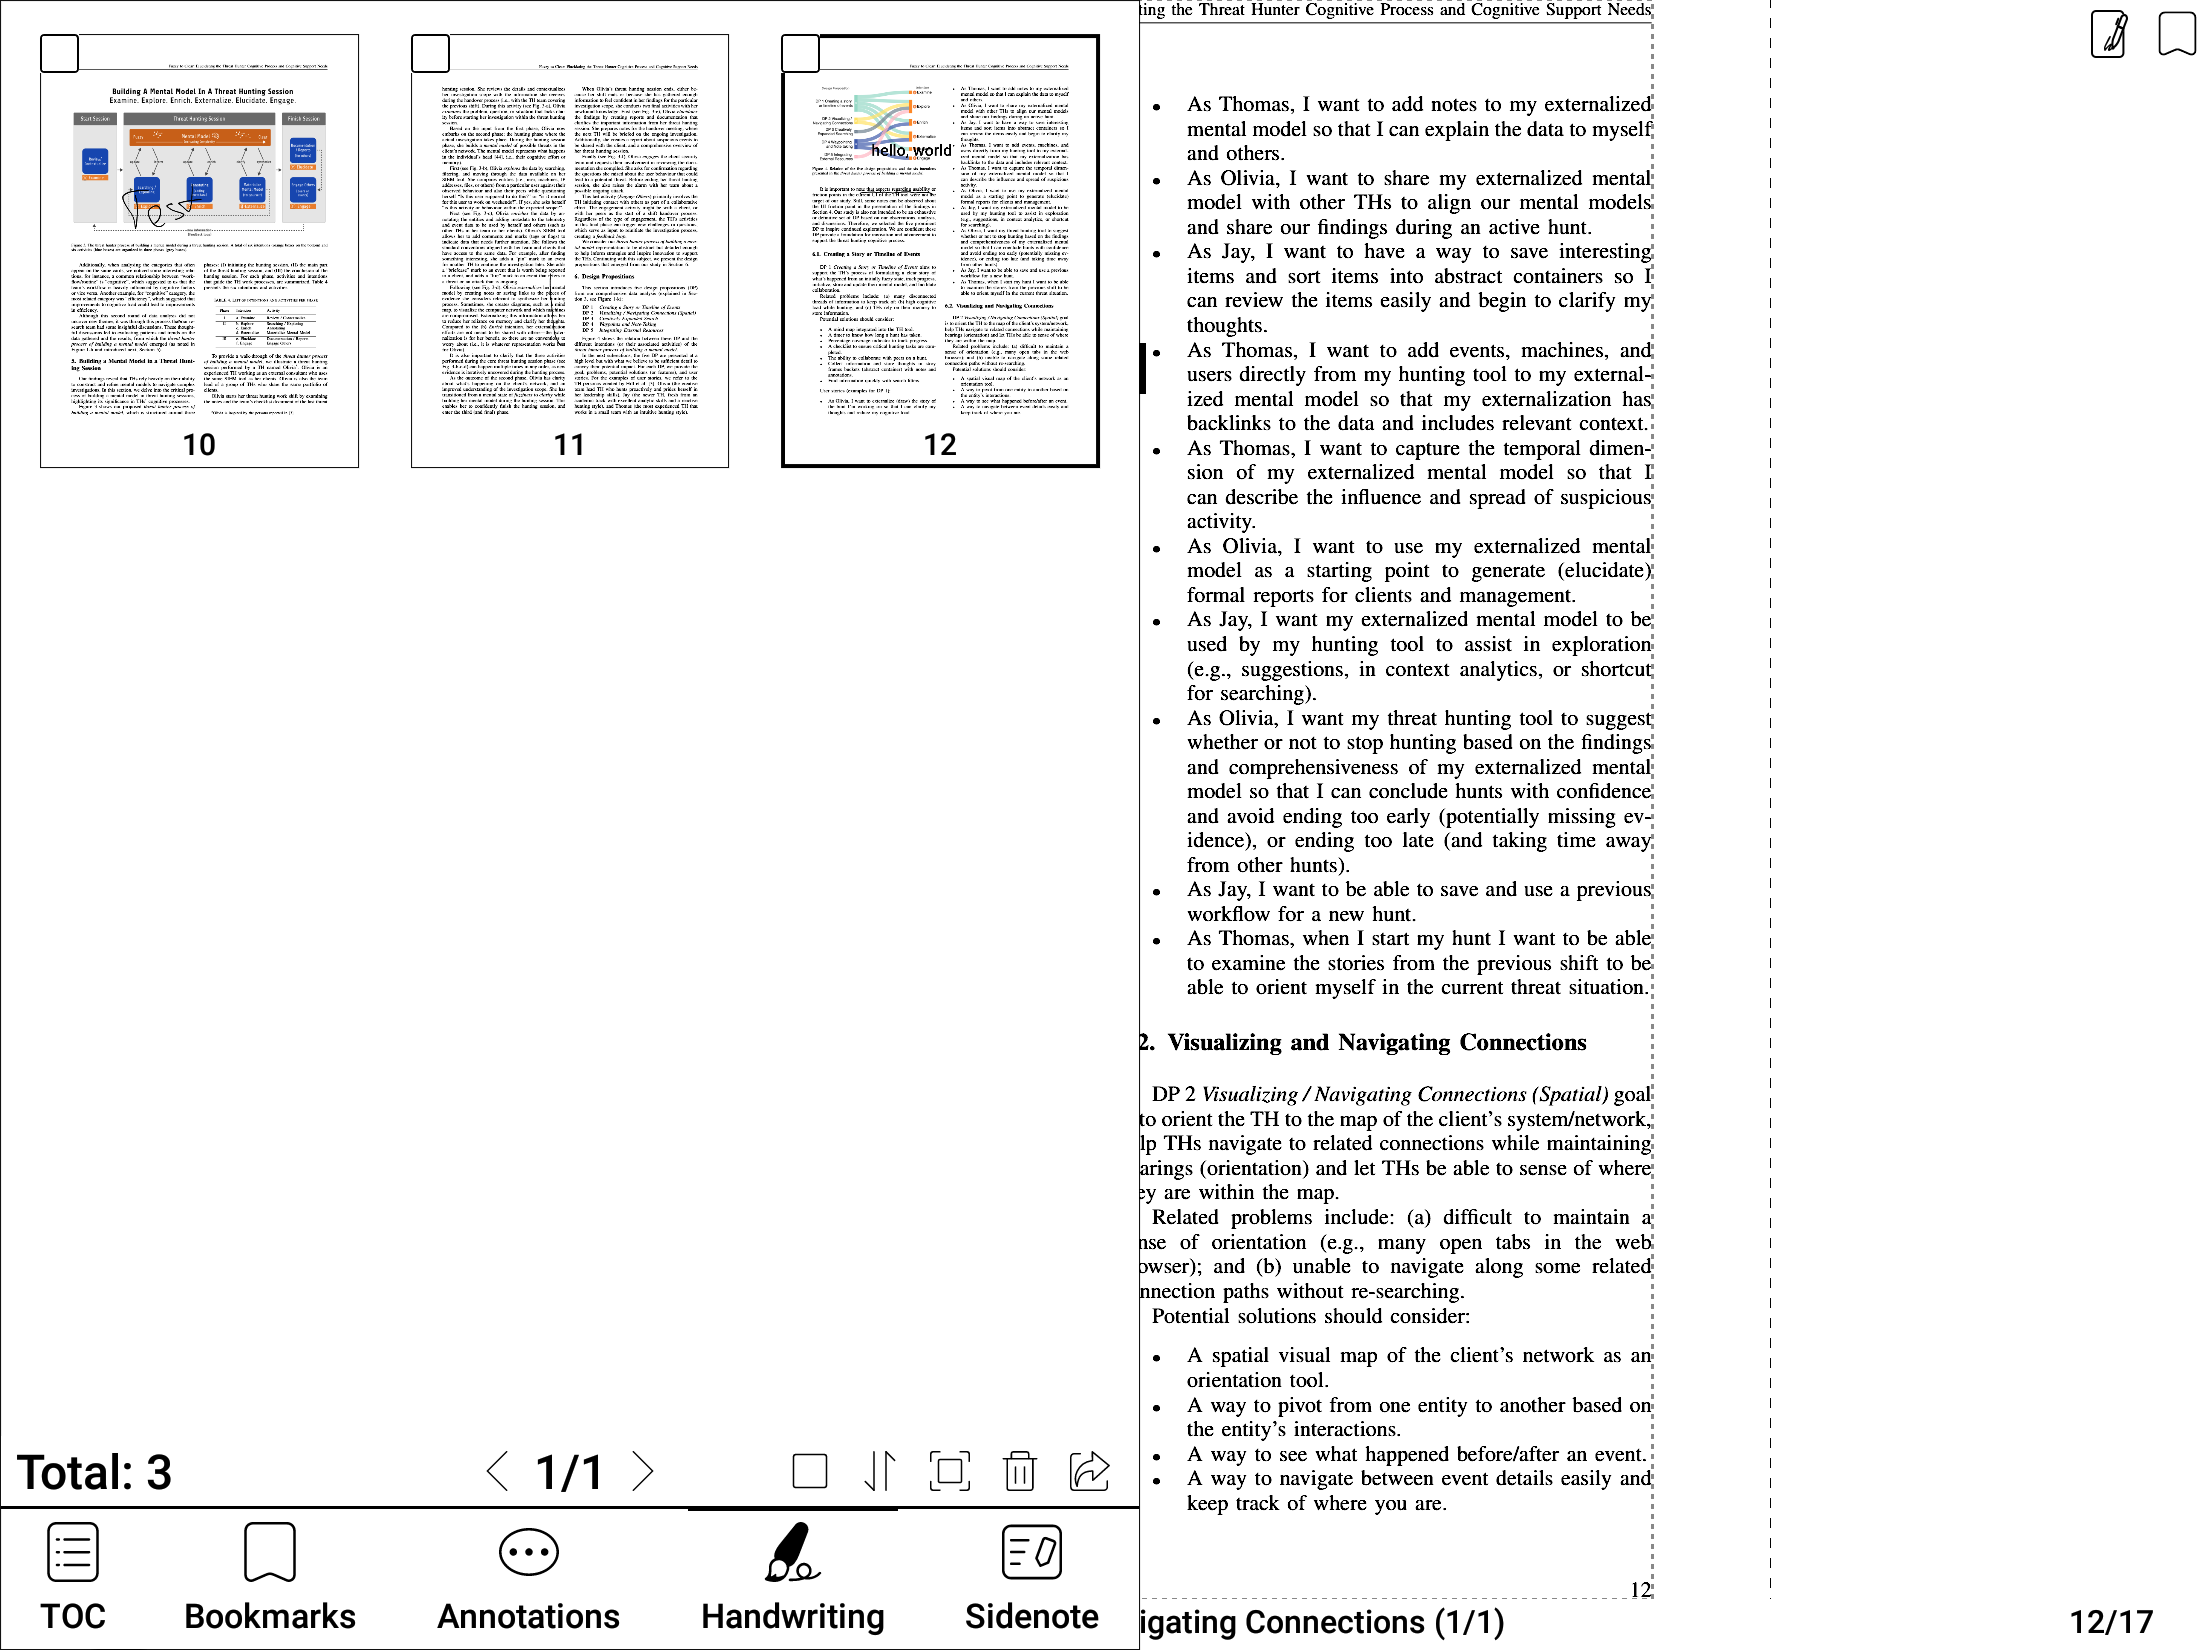
- Using the standard “Notes” app in a split-screen mode.
This is what I am finding the most useful actually.
The default “notes” app is modelled after OneNote, or something like that. It is surprisingly similar to org-mode, except, obviously, far less functional.
WARNING: When run in split-screen it sometimes loses data. This is very bad, so always, always export your data before exiting.
The “Notes” app supports “handwritten” and “text-based” modes.
Each book seems to allow one text-note, and one handwritten note. You can create as may notes from the Launcher interface as you want, but you cannot see them in split-screen with a book opened in NeoReader.
- Text-based notes
“Text-based notes” are essentially Markdown, and they can be exported either into a “txt” file, or into a “.notes” file.
The biggest stupidity is that in the text-based notes you cannot add handwritten sketches, whereas in “handwritten notes” you can add text-based fragments. One more stupidity is that you cannot make partial screenshots, “snips”, like what “Snipping tool” from Windows XP could do 20 years ago.
But I will give you a workaround, in case you need one.
- Zoom to the fragment you are interested in.
- Do a screenshot.
- Attach it to a “text note” as a “link”.
This trick also allows you to attach handdrawn sketches, albeit in a crutchy way.
- Use “side-notes” to add an empty sheet as a second page in a pdf.
- Open the new “exported pdf”.
- Draw your sketch on that empty second sheet.
- Zoom to it and make a screenshot.
- Attach the screenshot to the “text note”.
Overall, most of the notes one might want to take with NeoReader would be text notes, I believe. The text editor is passable, and supports simple markup.
Of course, generally you would want to use Emacs and epub, but when you have PDF, I suspect that NeoReader is your best choice. By all means, feel free to comment and suggest a better setup or at least a better tool. Maybe you had particular luck with KOReader? Share your thoughts.
- Handwritten notes.
Handwritten notes seem to imitate OneNote, or something like that.
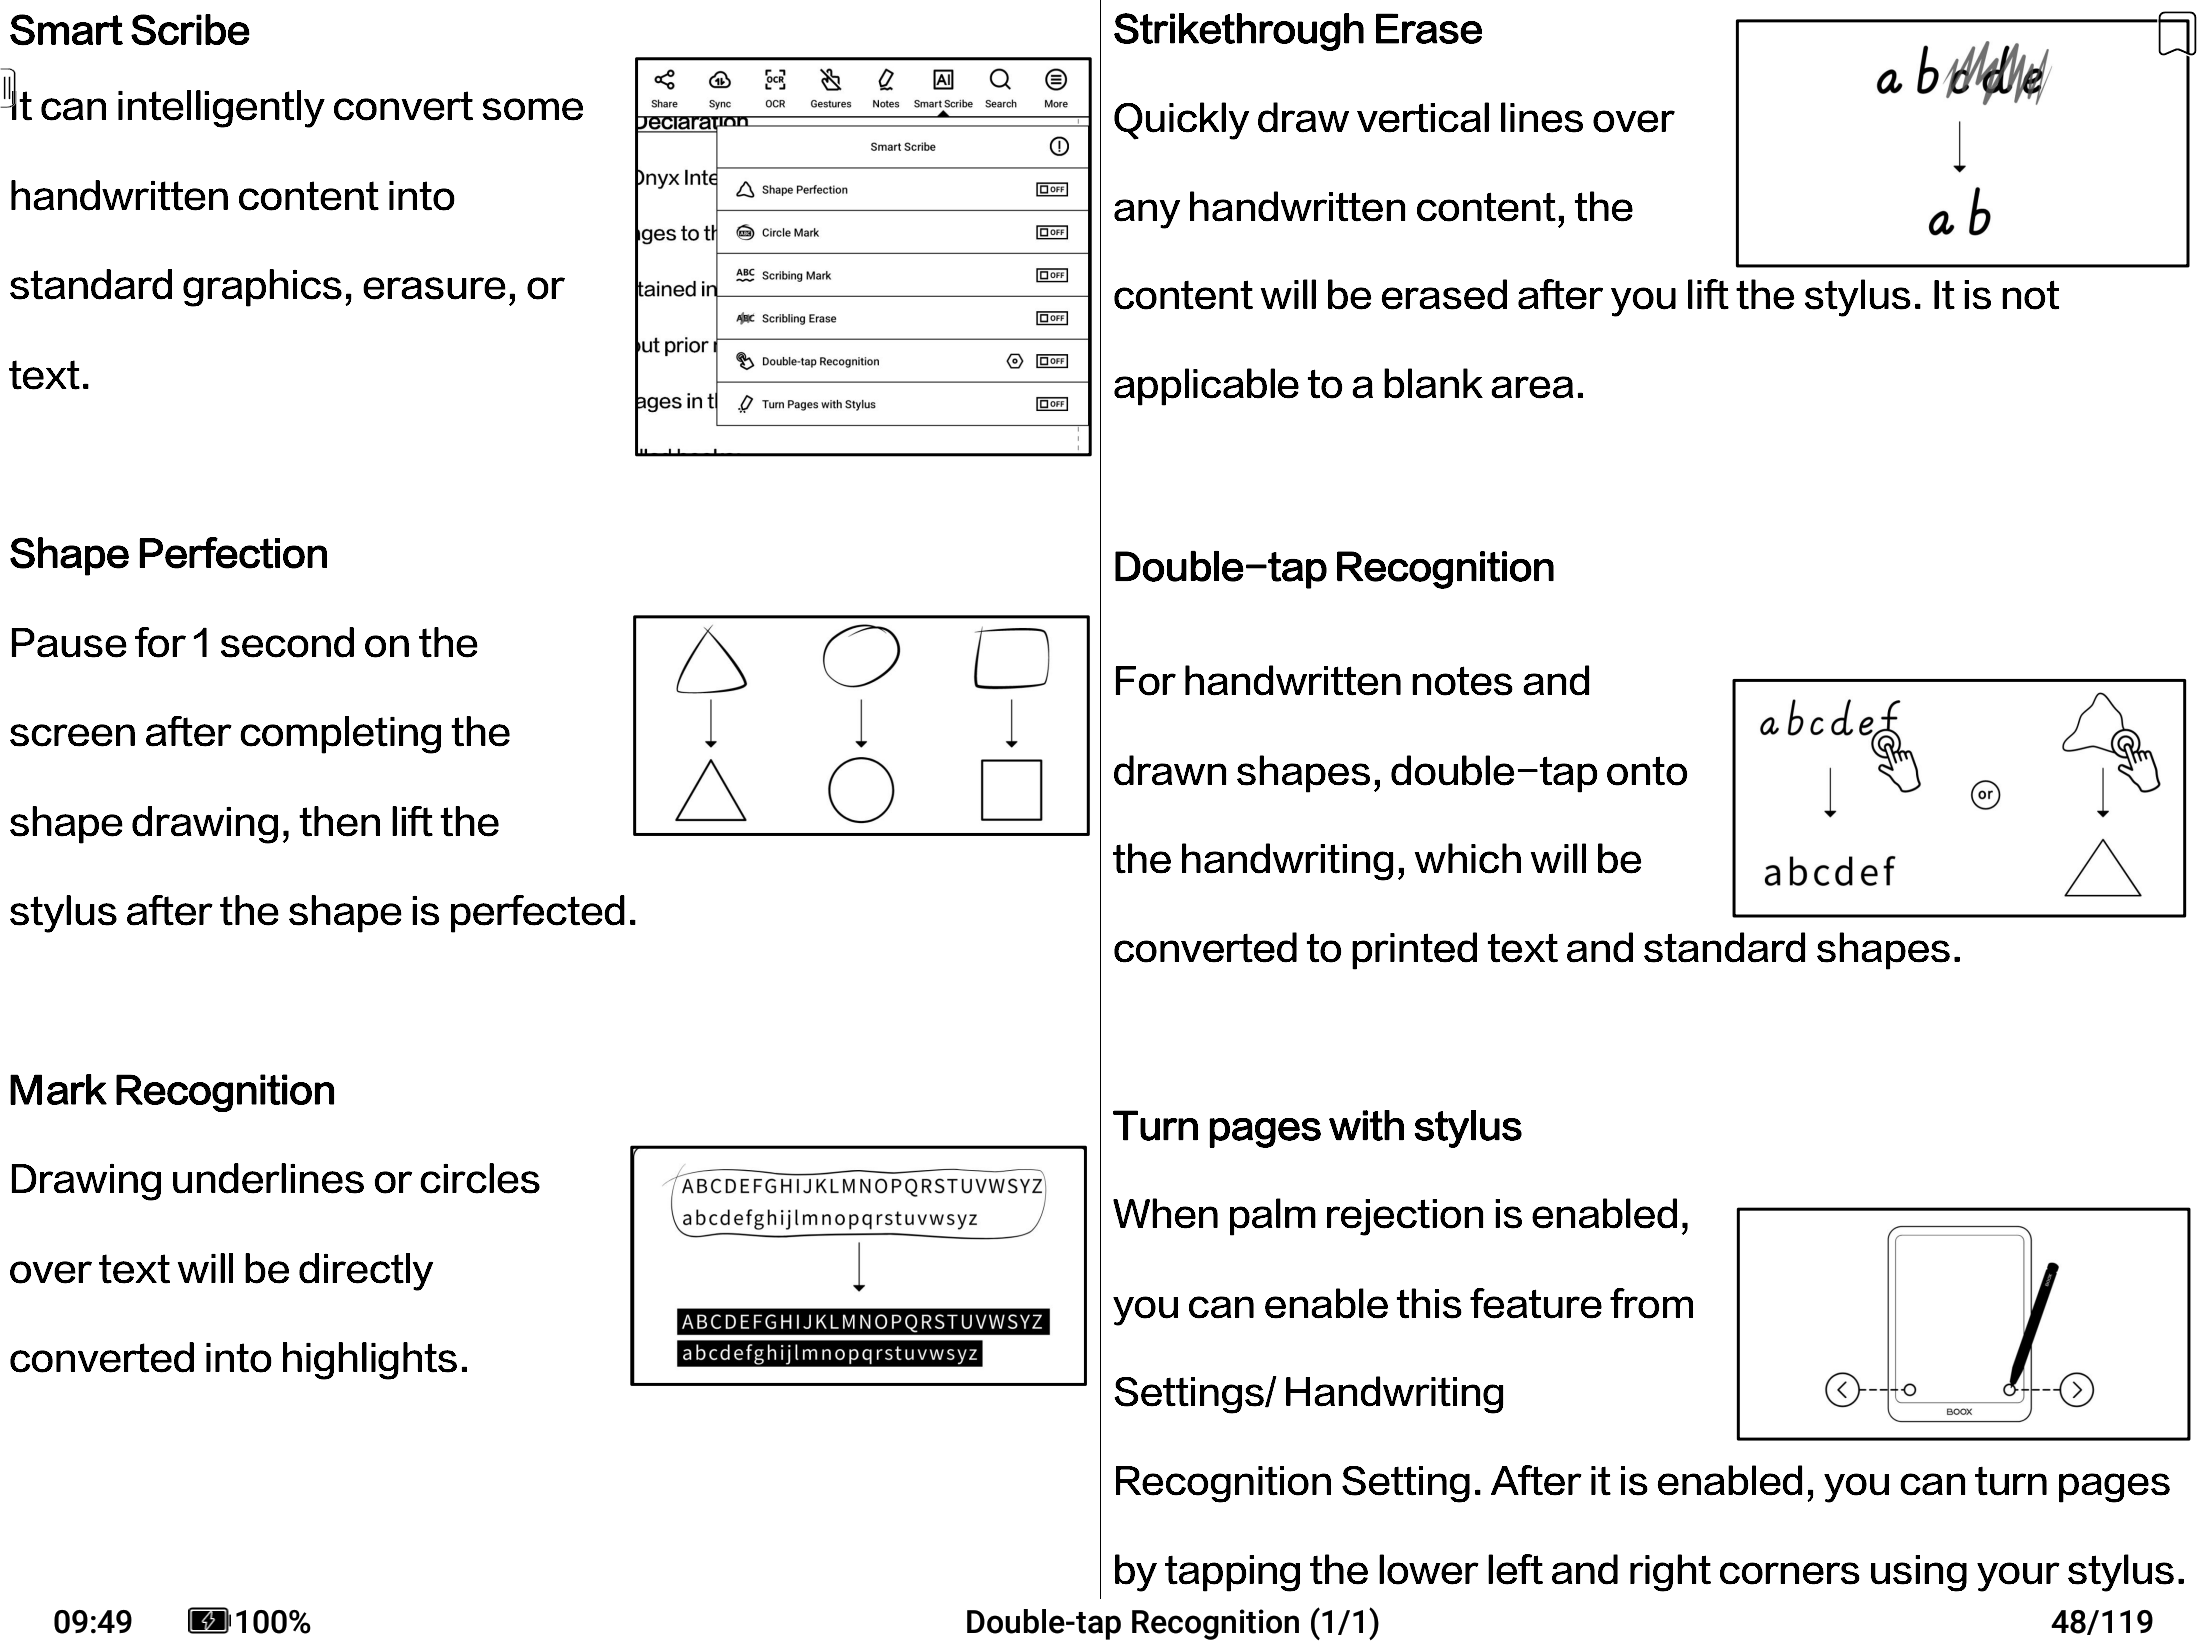
I found very little use for them, unless one is particularly interested in writing a lot of text with a pen, and then recognising is with the built-in “AI”.
Handwritten notes can be exported as a vector “.note” file, which I am not sure how to open, but if you really need it, it might work for you.
- “AI” recognition.
- Vector drawings.
You might want to use them on meetings, when carrying a keyboard in inconvenient, and you want to see the “meeting minutes” or a presentation file, and when reading a tutorial on drawing, when, I guess, vector “.notes” file is better than a vector PDF (created with a “side note”).
- Text-based notes
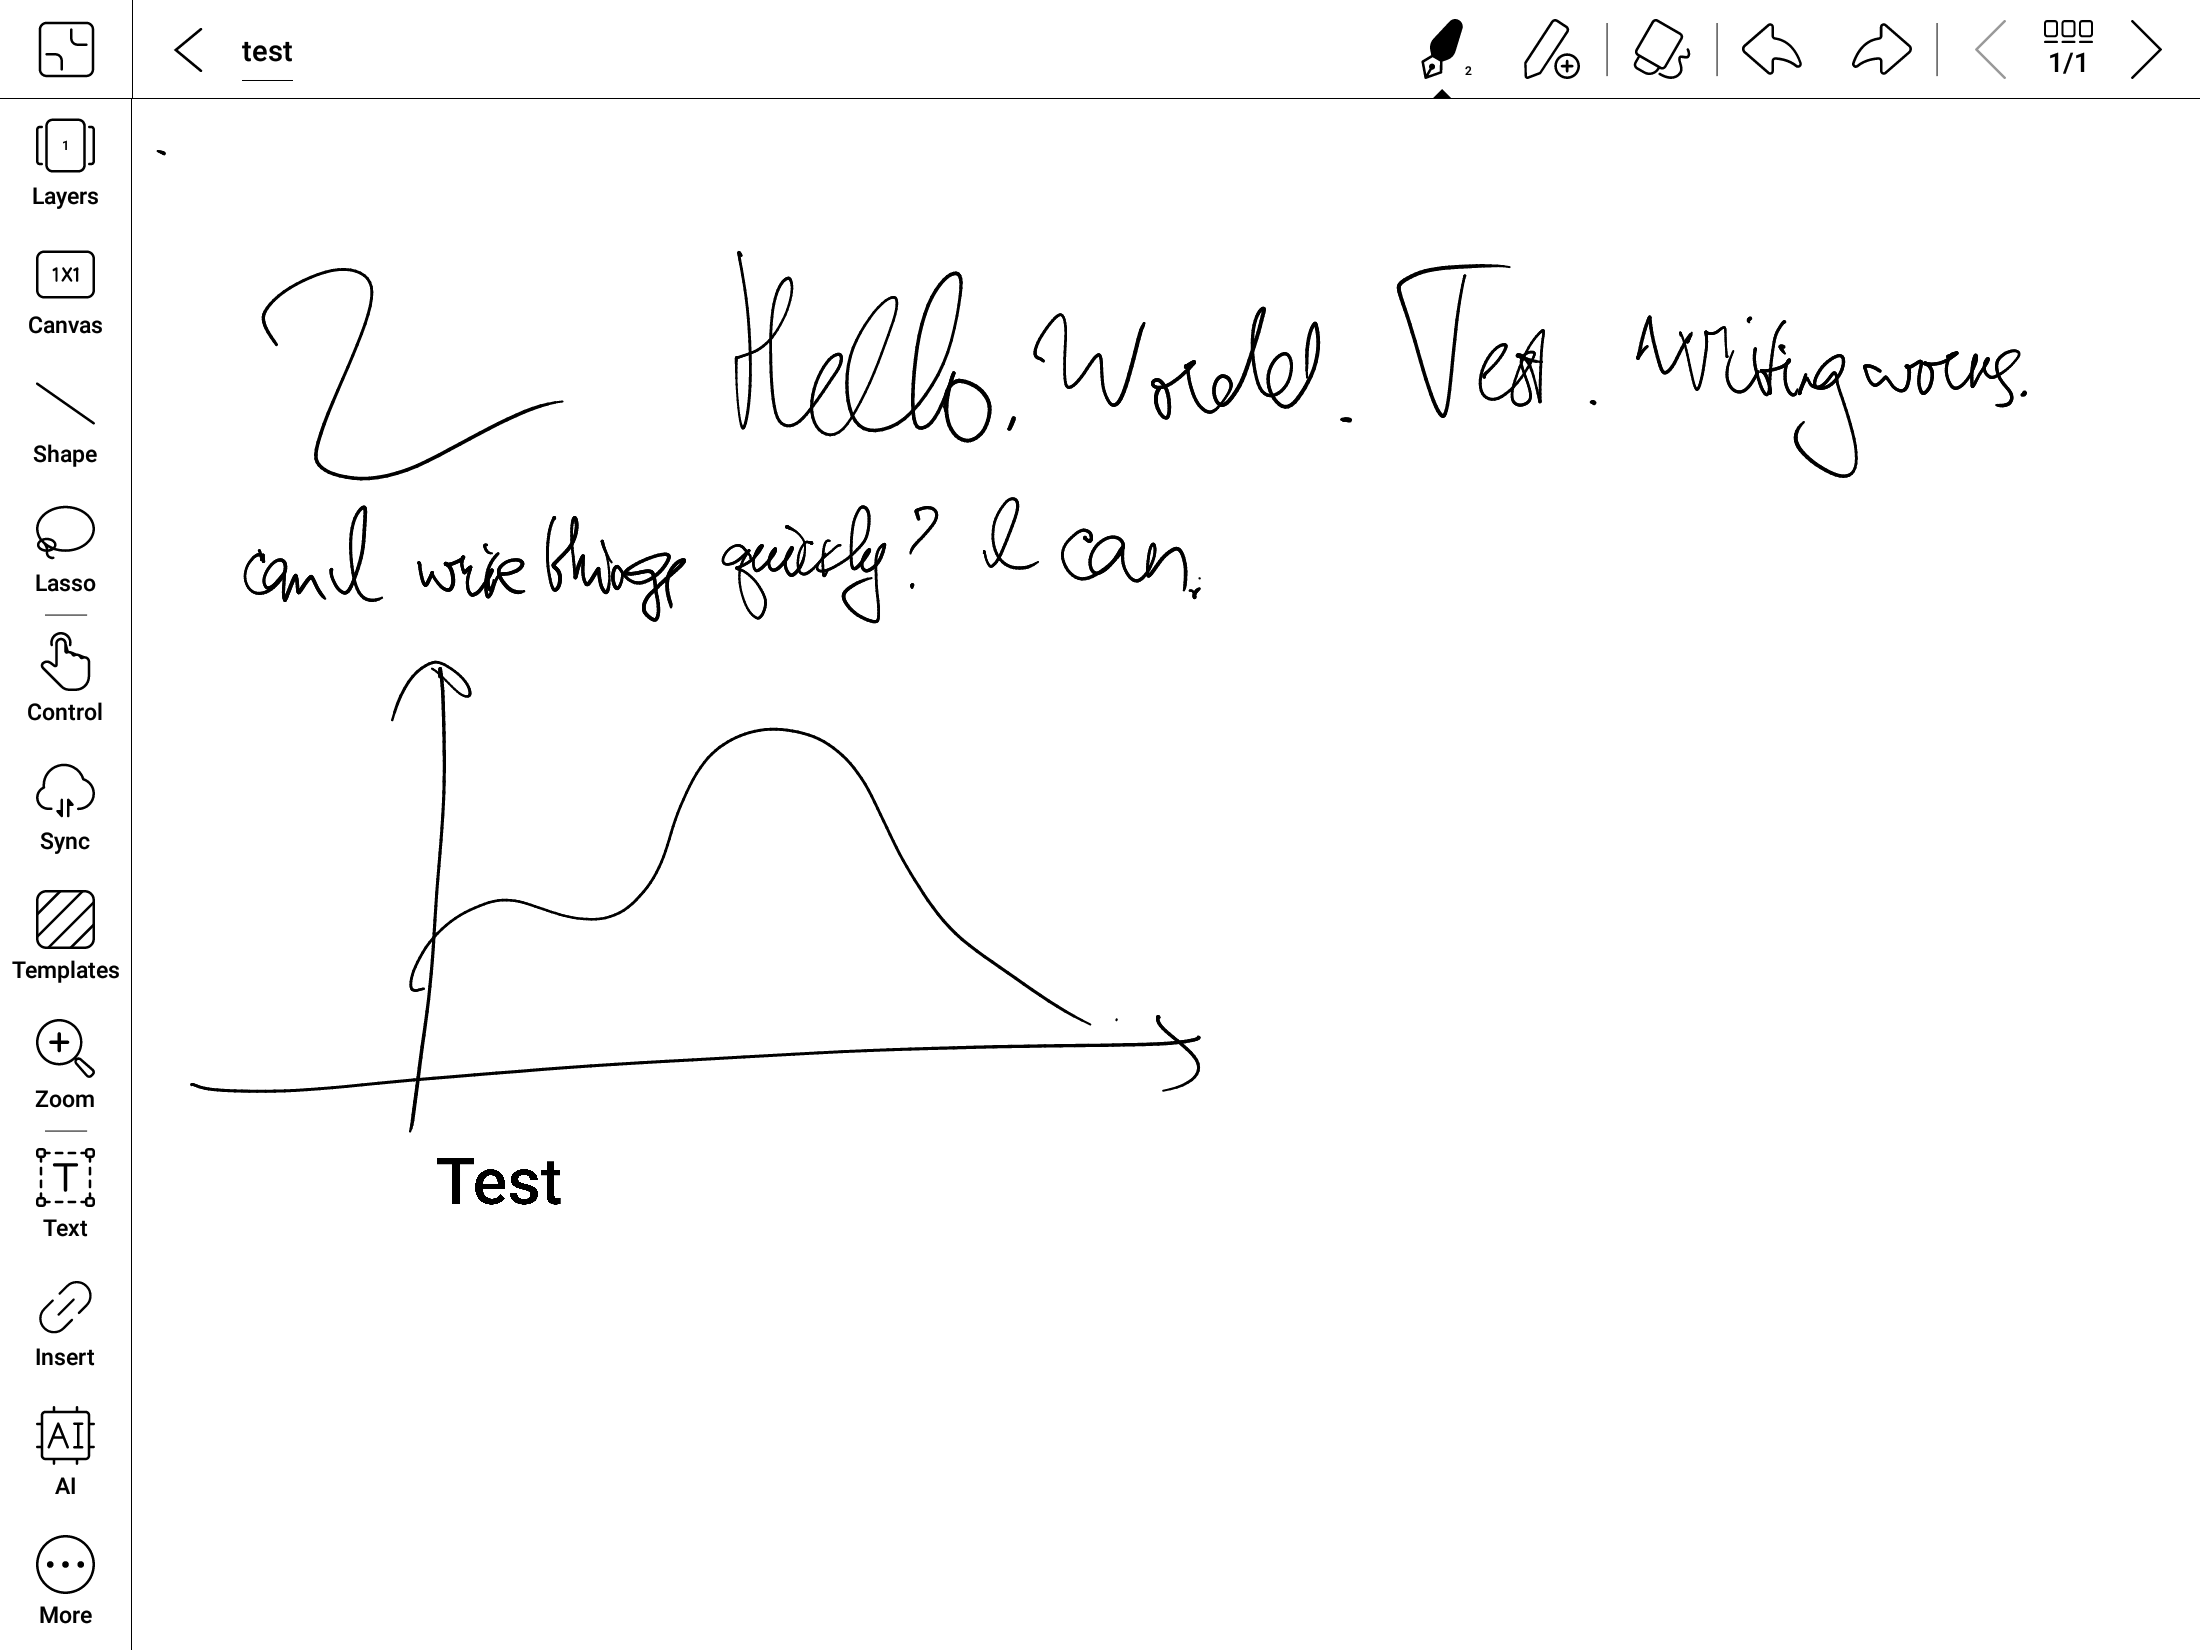
8.4. Notes
I will not write much here, because most of the things written the the “NeoReader” section apply to to this section too.
When you are doing mathematics, it is still usually better to have a reference paper by your side when writing formulae, and even so using Emacs to write TeX and skipping the handwritten formulae stage entirely is probably better.
One useful thing in the dedicated “Notes” interface is the “backup” option, callable from the menu. It exports everything into a database directory under “/sdcard/notes/backup”, so if you cannot find something your want to find, you can “backup everything” and reverse-engineer their binary stuff.
There is some setting in the options menu called “Tags”, but I don’t know what it means.
Here is a nice screenshot of using “Notes”, but don’t be misled by its nice appearance:
9. Certain peculiarities of using an eBook
The GUI of the eBook is extremely obscure, therefor I have to write an explanation for my future self here.
9.1. Magical directories
9.1.1. /sdcard/Pictures/Screenshots
This is the directory where screenshots go. Be very careful – if this directory is missing, the system will NOT create it by itself and the screenshots will disappear.
9.1.2. TODO sdcard.dedao_bookstore
9.1.3. TODO sdcard.ksync
9.1.4. TODO sdcard.noteCache
9.1.5. TODO sdcard.noteResource
9.1.6. TODO /sdcard/Books
9.1.7. TODO /sdcard/Push
9.1.8. TODO /sdcard/Shop
9.1.9. TODO /sdcard/VoiceRecord
9.1.10. TODO /sdcard/WifiTransfer
9.1.11. TODO /sdcard/baiduTTS
9.1.12. TODO /sdcard/dicts
9.1.13. TODO /sdcard/fonts
9.1.14. TODO /sdcard/jd_jeb_fonts
9.1.15. TODO /sdcard/note
9.1.16. TODO /sdcard/noteTemplate
9.2. eInk Center
9.2.1. Refresh modes
The eInk screen is very slow to refresh. It is possible to sacrifice some quality in the name of speed, using the “E Ink Center” in the drop-down menu.
Onyx Boox Max 2 supports 4 modes, called, for whatever reason, “Normal”, “Speed”, “A2” and “X”. All four seem to work for me, but I have seen no speed difference between “A2” and “X”, and X seriously loses detail.
9.2.2. Dark Color Enhancement
Turns grey into black.
Why exactly this setting is not in “App optimisation”? I have no clue.
9.2.3. White Color Filter.
Turns grey into white.
Why exactly this setting is not in “App optimisation”? I have no clue.
9.3. App optimisation
App optimisation is spawned by long-tapping on an app icon. I am not sure whether those optimizations make an app run faster, but for completeness, and because default descriptions of optimization components are very confusing, I will try to comment on the myself here.
9.3.1. Master switch
Turn on or off optimisations entirely. Does it do anything when the switch is on, but none of the features are enable, I am not sure.
9.3.2. TODO Others->Scrolling Buttons
No clue. TODO.
9.3.3. TODO Color
I do not really understand a lot of these settings. Help me if you can.
- Background color.
This setting is confusing.
So the eBook software assumes that you want to have white background.
So, this “Background color” setting will be subracted from the app background in order to make it white. The greater is the setting, the more colour will be subtracted from the background, eventually making it completely white.
Since text is sort of white-ish in dark-themed apps, you may want to “add strokes to text” . The added strokes are not bleached-out.
9.3.4. Other colors->{cover,icon} color
Unclear, I have not seen them to be useful.
10. Built-in apps
10.1. Screen Cast
This seems to be Miracast.
I have never actually found Miracast useful.
10.2. BooxDrop
This a tool to transfer books to the eBook over http.
Funnily, it is 2024, but the problem of file transfer/sharing is not solved. Yes, we have Windows CIFS, Linux NFS, and many other things, but since it is much sweeter to have a naive user uploading his data to your computer than providing him with a tool to do everything locally, file transfer problem is still a problem in 2024.
BooxDrop starts a web server, which you can visit from your laptop or phone, and transfer some files with HTTP PUT.
No security, nothing confusing. Very light and very useful, if transfer via adb, syncthing, conversations, or something like that does not work.
HTTP screen casting (boox drop cast) does not work on Max 2.
BooxDrop is trying to be smart when receiving files, and tries to classify them.
- epub and mobi files go to sdcard/Books
- jpg and other image files go to /sdcard/Pictures
- apk, and probably other files go to /sdcard/Download
Where do other files go I do not know.
It can also download things automatically from Onyx cloud, I think, but I do not have an account.
10.3. Monitor
This is stock app to display HDMI input. Can be very useful if you want to connect the eBook as a second monitor to your heavy laptop.
I did not, however, managed to make it work with an Android phone.
10.3.1. TODO Find a way to make Boox Max2 work with an Android phone over USB-C.
This is my question on Reddit:
10.4. Miracast Player
This is not a stock program, but you might want to use it still.
It’s Android ID is com.playfwd.miracastplayer
It is incredibly slow, and I did not manage to make it work in a supposedly fast VLC mode, but if you are only interested in making the eBook work as a digital photoframe… well, you are still better off using Emacs for that.
10.5. Calendar
This is a stock app, which is otherwise not even worth mentioning, but you can add handwritten notes to calendar events. I have no idea why you might want to do that, but you can.
10.6. VLC
VLC installs and runs on this device. Not sure if it is good enough for playing anything, and you are probably better off watching videos and listening to music on your phone. One valid reason for using it though is playing PDE solution animations.
11. Typical Tasks
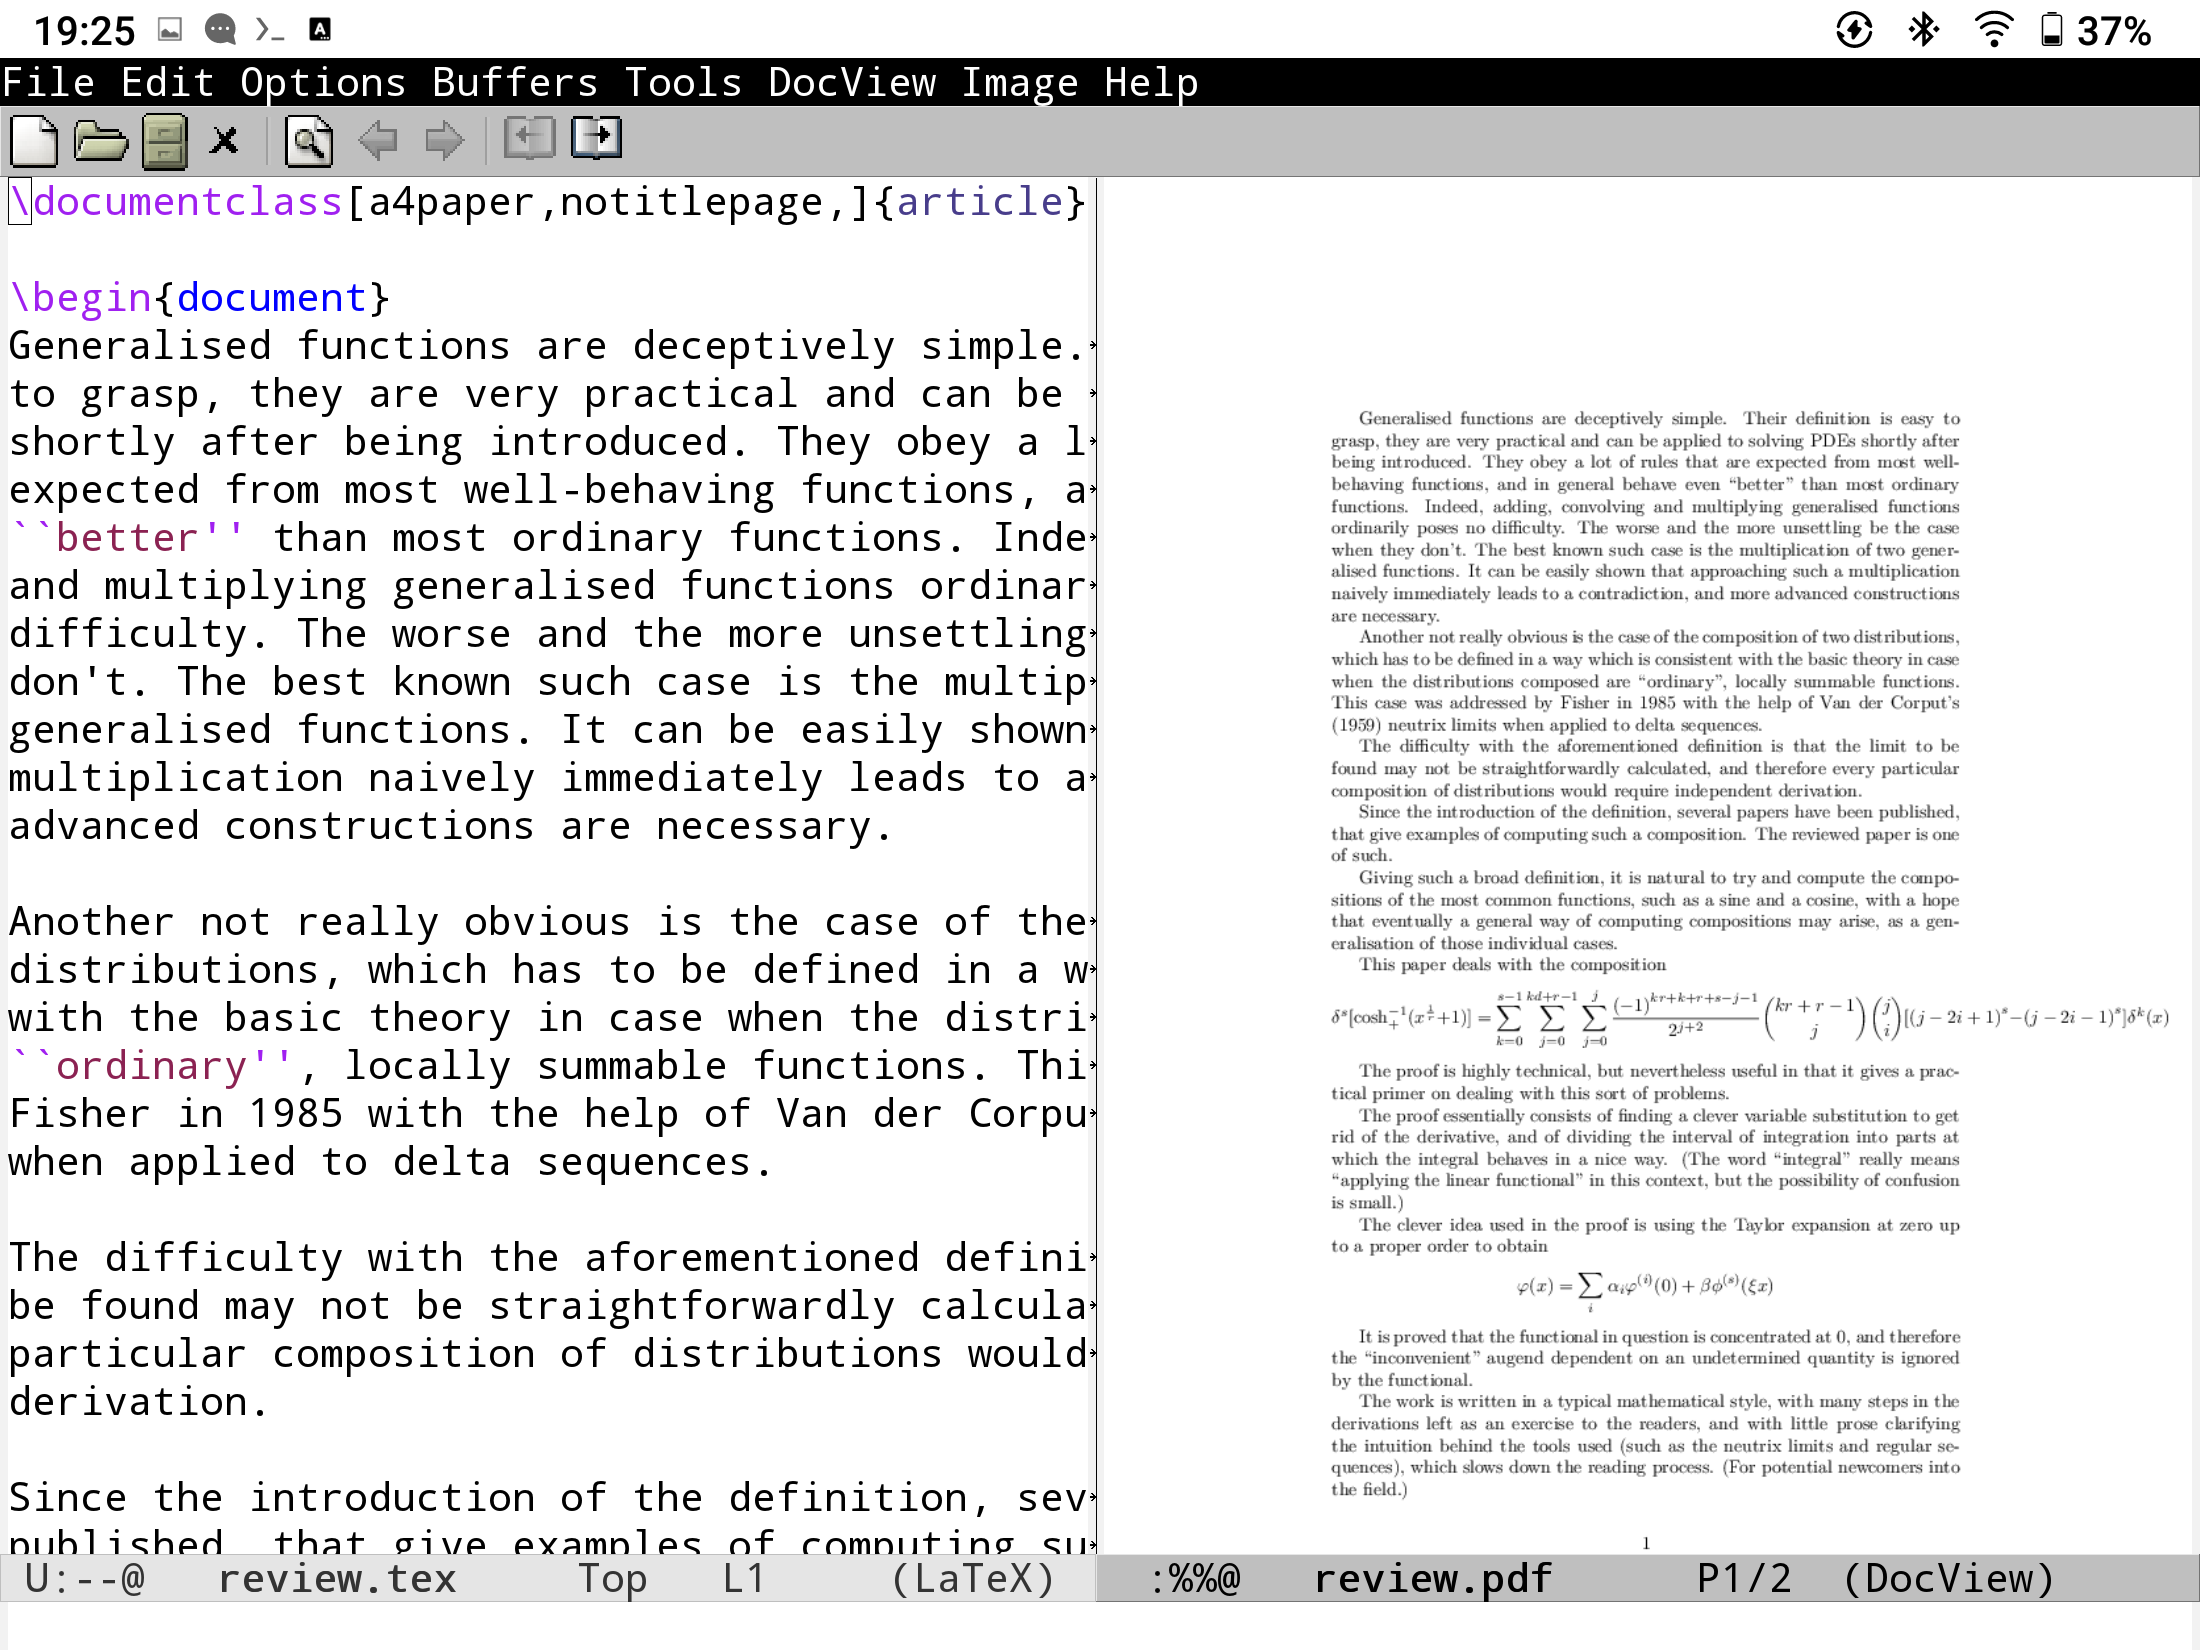
11.1. TeX
I will not delve into this question deeper, but you have two options for TeXing: you can tramp onto your laptop in Emacs, open a tex file and doc-view-mode. The only difficulty here is running TeX commands on the remote device. The upside is not having to sync anything, and that on your laptop you can customize TeX any way you want.
Or, if TeXLive 2019 is enough for you, you can run it right on the device itself.
Remote:
Local

11.1.1. Updating to TeXLive 2024.
So, I had issues with using Texlive 2019, I suspect because of installing some packages, or something like that, I broke my installation.
But no problem, I managed to update to Texlive 2024 from termux-current, and now everything works.
- pull termux packages from https://github.com/termux/termux-packages
- checkout an android-5 branch into a worktree git worktree add ../termux-packages-android5
- copy packages/{zziplib,libpaper} into the android6 tree
- cd termux-packages-android5 ; ./build-package.sh -I libpaper ; ./build-package.sh -I zzliplib
- There is some issue with the installed zziplib, you need to make a softlink libzzip.so to a correct libzzip-0.so.12.bla
- copy texlive-bin and texlive-installed into android6 tree
- ./build-package.sh -I texlive-bin ; ./build-package.sh -I texlive-installer
- termux-install-texlive
- wait 3 hours
- Profit
11.2. Using TeX from Emacs
Okay, so, you have TeXLive 2024 installed and would like to write books using Emacs, and compile them semi-automatically, using Emacs’ ugly and buggy TeX support, such as AUCTeX.
Soon you find out that even though Emacs can “call” lualatex, there are some issues preventing it from running correctly under Emacs “android user”. What to do?
You might want to open an Emacs shell or an Emacs Term, and run lualatex from there, but soon you find out that Emacs shell inherits all the issues of bare Emacs: it cannot run lualatex successfully, just as it cannot run pkg from Termux.
This problem may be solvable using some clever trickery, but I found a fun and easy way of solving it – tmux.
So, I run tmux in the termux session, and from Emacs’ Term-mode I run termux attach.
Then the shell running in the Emacs terminal is Termux’ shell, and pkg and lualatex both work.
12. Install racket for Scheme
- Racket in android5 is too old, install it from -master
- raco pkg install –scope installation rackunit
- Open emacs and install racket-mode
rackunit is needed by racket-mode, but you MUST install it with –scope installation, because termux has a different profile to Emacs, and racket-mode would not find it.